3D Print Stringing: What Causes It & How to Fix It
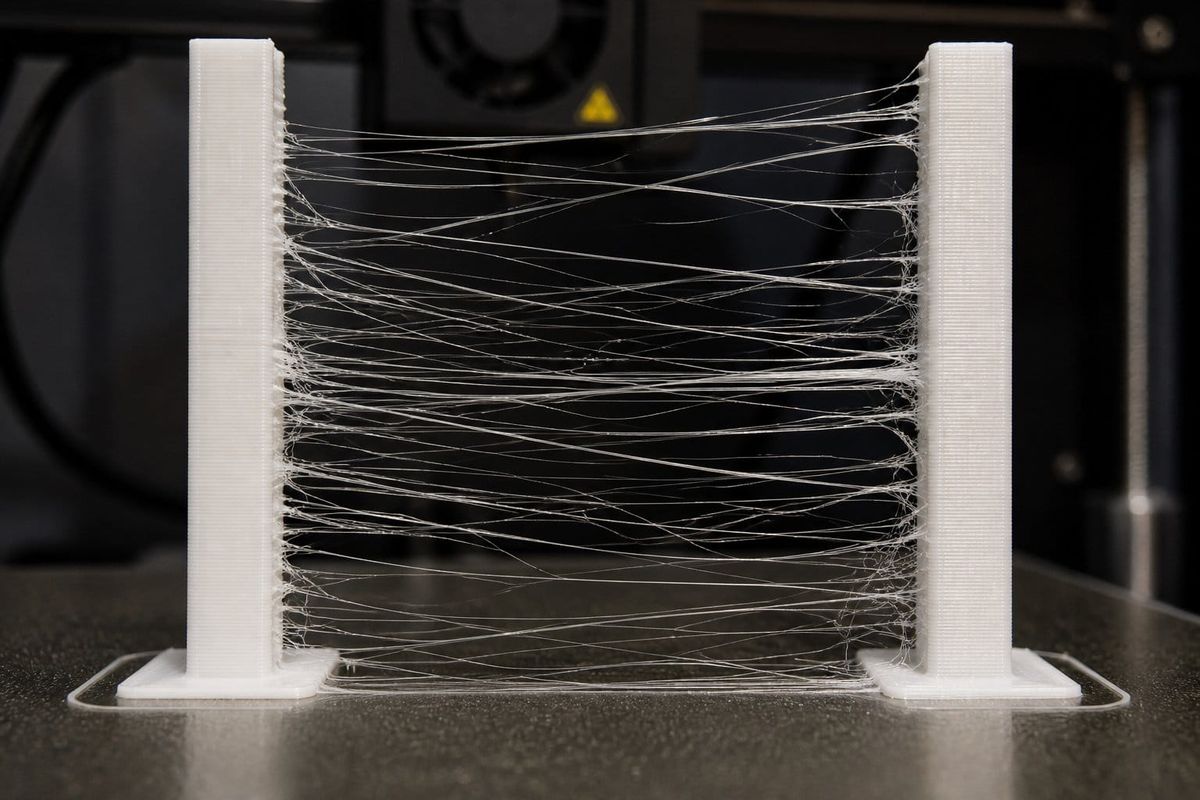
Stringing is a common 3D printing defect. It occurs when thin, hair-like strands of plastic are left between separate parts of a print. This issue is commonly caused by incorrect retraction, high nozzle temperature, slow travel speed, or moist filament. Fortunately, stringing can be easily fixed by adjusting some slicer settings. This guide explains what causes stringing and shows you how to fix it for cleaner, higher-quality prints.
Quick Diagnosis Table
Before we move on to details, here is a quick overview of the common problems and their fixes:
|
Symptom |
Most Likely Cause |
Fix (try first) |
|
Thin threads between all travel moves |
Retraction too low |
Increase retraction distance by +0.5 mm. |
|
Stringing gets worse with a new/old spool |
Wet filament |
Dry filament (PLA: 50°C/6h, PETG: 65°C/6h) |
|
Stringing only on long travel moves |
Travel speed too slow |
Increase travel speed to 200+ mm/s |
|
Thick blobs and strings |
Temperature too high |
Lower nozzle temperature by 5–10°C |
|
Stringing appeared suddenly (worked before) |
Nozzle wear or partial clog |
Clean or replace the nozzle |
What Is 3D Print Stringing?
3D print stringing (also called oozing or 'hairy prints') happens when thin threads of melted filament are left behind as the nozzle travels between two points without printing, creating cobweb-like strands on the model surface.
In 3D printing, stringing occurs when the nozzle travels from one point to another without extruding, but residual pressure inside the hot end pushes a small amount of molten filament out. When the nozzle moves, this plastic gets stretched out into thin hair-like threads.
Stringing is different from blobs (caused by localised over-extrusion) and oozing, where the material builds up on the tip of the nozzle. It is one of the most common issues in FDM 3D printing, but also one of the easiest to fix by changing slicer settings like retraction, nozzle temperature, and travel speed.
What Causes 3D Printing Stringing?
Insufficient Retraction
When the printer moves from one point to another without printing, the extruder pulls the filament backwards by a small distance. This process is called 'retraction', and it helps to relieve the pressure in the hot end and prevent the molten filament from leaking out of the nozzle. If the retraction distance is too short, or the retraction speed is too slow, insufficient pressure will be relieved. This causes filament to still ooze out and form thin strings between different parts of the print.
Nozzle temperature Too High
A high nozzle temperature makes the molten filament more runny, causing it to ooze out of the nozzle more easily.
Travel Speed Too Slow
When the travel speed is too slow, the nozzle spends longer moving between print sections. This allows more filament to ooze from the nozzle.
Wet Filament
Many 3D printer filaments are hygroscopic, meaning that they absorb moisture from the air over time. This moisture, when it reaches the hot end, turns to steam and disrupts the smooth flow of molten filament, causing it to ooze more easily from the nozzle.
Other Less Common Causes
Other causes of stringing include:
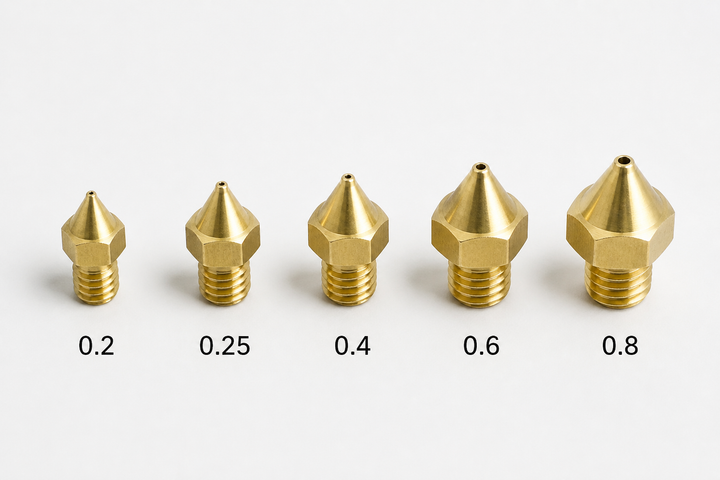
- Nozzle wear: the nozzle opening becomes larger over time.
- Partial clog in nozzle: causes unstable pressure in hot end.
- Models with many isolated features: need frequent long travel moves.
How to Fix 3D Print Stringing (Step by Step)
In the following sections, we have covered 5 proven fixes for stringing. Start with Fix 1 and work your way down the list, testing your print after each adjustment. If the stringing disappears, you can stop troubleshooting.
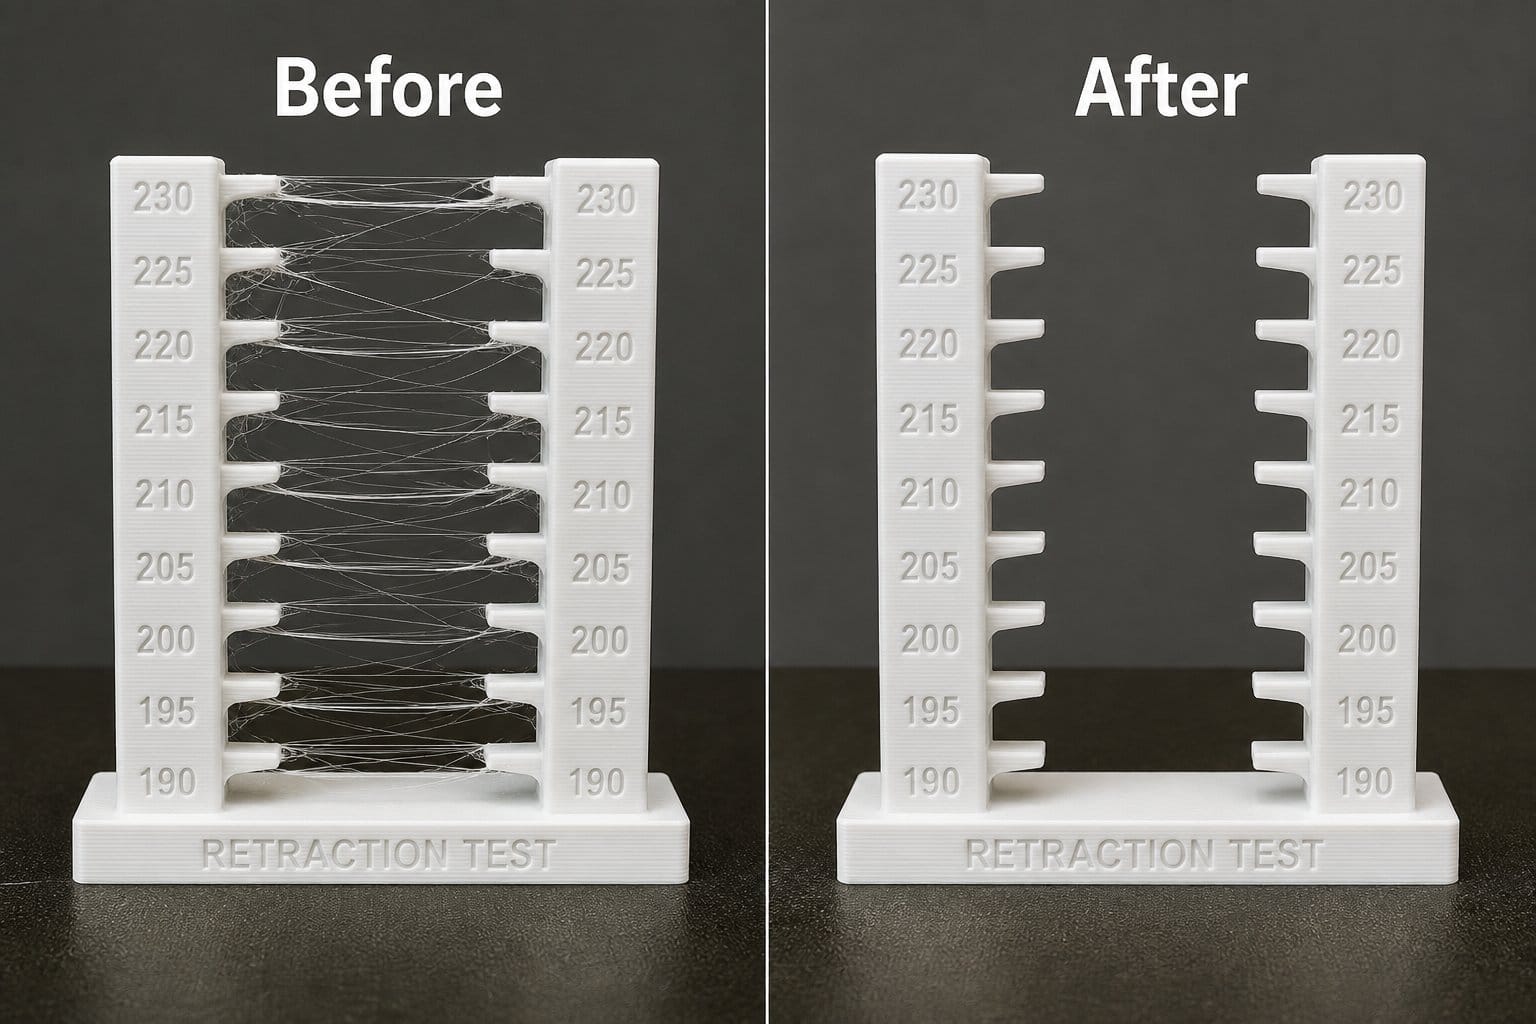
Fix 1: Increase Retraction Distance and Speed
Retraction settings are usually the first place to start when fixing stringing. This single adjustment often resolves around 80% of stringing issues.
|
Extruder Type |
Retraction Distance |
Retraction Speed |
Examples |
|
Direct Drive |
0.5–2 mm |
40–60 mm/s |
Bambu X1/P1/A1, Prusa MK4, Voron |
|
Bowden |
4–7 mm |
40–60 mm/s |
Ender 3, CR-10, Artillery |
How to dial it in
Increase the retraction distance in 0.5 mm increments. After each adjustment, print a stringing test tower (also called a retraction test) to evaluate the results. Continue increasing the value until the fine threads between the towers disappear.
Avoid increasing the retraction distance more than necessary. Excessive retraction can cause under-extrusion, resulting in gaps in walls or layers when printing resumes.
Where to find the setting
- Bambu Studio / Orca Slicer: Filament Settings → Retraction Length → Retraction Speed
- PrusaSlicer: Printer Settings → Extruder 1 → Retraction → Length / Speed
- Ultimaker Cura: Travel → Enable Retraction → Retraction Distance / Retraction Speed
Fix 2: Lower Nozzle Temperature
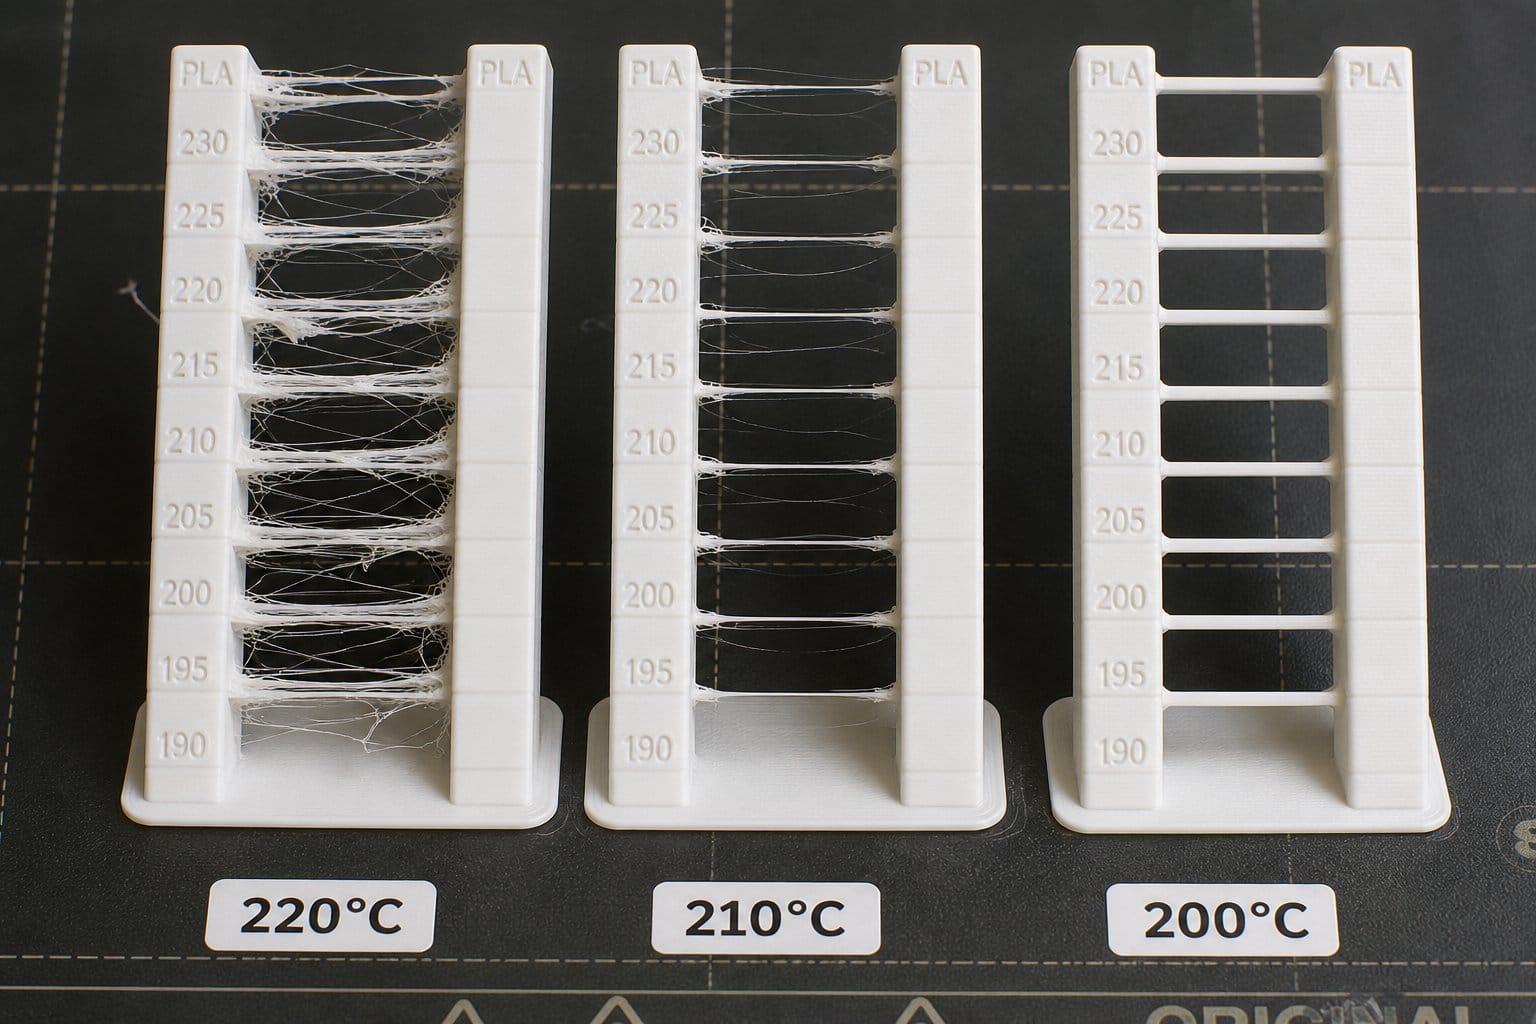
If increasing the retraction distance does not eliminate stringing, try lowering the nozzle temperature. Reduce the nozzle temperature by 5–10°C from your current setting, then print a stringing test model to evaluate the results.
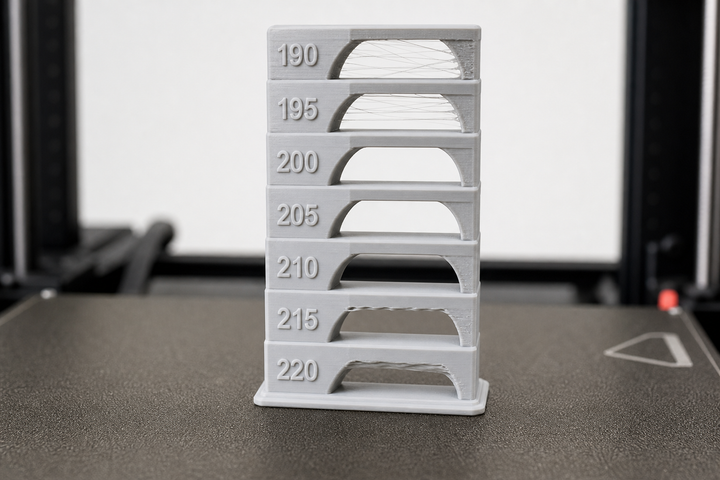
A temperature tower is the best way to find the lowest nozzle temperature that still produces clean layers without under-extrusion. Continue lowering the temperature in small increments until the stringing disappears.
Recommended nozzle temperature ranges
- PLA: 195–205°C
- PETG: 225–235°C
- TPU: 210–220°C
Avoid lowering the nozzle temperature too much. A low nozzle temperature does not cause stringing. Instead, it leads to under-extrusion, poor layer adhesion, and weak prints.
Fix 3: Increase Travel Speed
The default travel speed on most printers is around 150 mm/s. If you're experiencing stringing, increase it to 200–250 mm/s, then print a stringing test model to evaluate the results.
If you notice ringing or ghosting after increasing the travel speed, reduce it by 25 mm/s until the artifacts disappear.
Fix 4: Enable "Avoid Crossing Walls"
This setting changes the nozzle's travel path so that it moves inside the model whenever possible, rather than crossing open air. It doesn't stop the nozzle from oozing, but it keeps any remaining strings inside the part where they won't be visible.
Where to find the setting
- Bambu Studio / Orca Slicer: Avoid Crossing Wall
- PrusaSlicer: Avoid Crossing Perimeters
- Ultimaker Cura: Combing Mode → All
Keep this setting enabled for most prints. It acts as a safety net by hiding any remaining strings inside the model.
Fix 5: Dry Your Filament
If you have already optimized your retraction, nozzle temperature, travel speed, and travel path settings but are still getting stringing, your filament has likely absorbed moisture.
As wet filament passes through the hot end, the absorbed moisture turns into steam. This increases the pressure inside the nozzle, causing molten filament to ooze continuously during travel moves—something that retraction alone cannot fully prevent.
|
Filament |
Drying Temperature |
Drying Time |
|
PLA |
50°C |
6 hours |
|
PETG |
65°C |
6 hours |
|
TPU |
60°C |
8 hours |
|
Nylon |
70°C |
12 hours |
To prevent moisture absorption, store your filament in sealed bags or a dry box with desiccant.
3D Print Stringing by Material
PLA Stringing Fix
PLA is the least string-prone of the common FDM filaments. If you're getting stringing with PLA, it's most likely caused by a nozzle temperature that is too high or moisture in the filament.
A good starting point is:
- Retraction: 1 mm (Direct Drive) or 5 mm (Bowden)
- Nozzle temperature: 200°C
- Travel speed: 200 mm/s
If you still have stringing, lower the nozzle temperature to 195°C and print another stringing test. If the problem persists, dry the filament or try a different spool, as damp PLA is a common cause of persistent stringing.
PETG Stringing Fix
PETG is naturally more prone to stringing than PLA because it remains semi-molten over a wider temperature range and tends to stretch into thin threads rather than breaking cleanly during retraction. Some stringing is normal and does not necessarily mean your print settings are incorrect.
In addition to the standard fixes, try the following:
- Enable Wipe Before Travel in your slicer.
- Increase the retraction speed to 60–70 mm/s.
- Set the part cooling fan to 30–50%. Avoid using 100% cooling, as PETG requires good layer adhesion.
- Dry the filament before printing. Wet PETG can produce significantly more stringing than a dry spool.
Even with optimal settings, some stringing may still remain. It's normal for PETG prints to require a small amount of post-processing, such as removing fine strands by hand or with a heat gun.
TPU / Flexible Filament Stringing Fix
Flexible filaments behave differently from rigid materials. During retraction, the filament compresses and stretches, making retraction less effective at relieving pressure inside the hot end.
For best results:
- Use a direct drive extruder whenever possible.
- Keep the retraction distance between 0.5–1 mm. Higher values can cause filament buckling or jams.
- Set the nozzle temperature to 210–220°C.
- Reduce the print speed to 20–30 mm/s for more consistent extrusion.
Even with optimized settings, some stringing is expected when printing TPU. Fine strands can usually be removed during post-processing with a heat gun or flush cutters.
ABS and Nylon Stringing Fix
ABS and Nylon are printed at higher temperatures than PLA, making them more prone to oozing and stringing.
To reduce stringing:
- Print inside an enclosure to maintain a stable thermal environment.
- Dry the filament thoroughly before printing, especially Nylon, which absorbs moisture very quickly.
- Use a slightly higher retraction distance than you would for PLA, then fine-tune it using a stringing test.
How to Remove Stringing After Printing
After printing, a few fine strands may still remain. These can be removed with simple post-processing. However, this should be treated as a temporary solution rather than a permanent fix. If your prints consistently require extensive cleanup, go back and fix the root cause in your slicer settings.
|
Method |
Best For |
Tips |
|
Heat gun (low setting, 10–15 cm
distance) |
Large areas with many fine threads |
Quick sweeping passes—don't hold still
or PLA will deform |
|
Lighter (fast
pass) |
Small areas,
quick cleanup |
Pass quickly at distance; don't ignite the plastic |
|
Craft knife/deburring tool |
Thick individual strings |
Be careful around thin features |
|
Fine sandpaper (220 grit) |
String root residue on surface |
Light pressure only |
Post-print cleanup is only a band-aid. If the stringing is severe enough to require extensive cleanup, adjust your retraction, temperature, or travel settings instead. If you suspect a clogged nozzle is contributing to the problem, clean it before your next print.
FAQs
How do I stop my 3D printer from stringing?
Increase the retraction distance in 0.5 mm increments, printing a stringing test after each adjustment. If stringing persists, lower the nozzle temperature by 5–10°C and increase the travel speed to 200 mm/s or higher. Enable Avoid Crossing Walls (or the equivalent setting in your slicer) to reduce visible strings during travel moves. If the problem continues after these settings are optimized, dry your filament.
Can low temperatures cause stringing?
No. Low nozzle temperatures cause under-extrusion, poor layer adhesion, and poor surface quality—not stringing. Stringing occurs when the nozzle temperature is too high, making the molten filament more fluid and allowing it to ooze during travel moves.
What does stringing mean in 3D printing?
Stringing is the formation of thin, hair-like strands of plastic between different parts of a print. It occurs when the nozzle moves without extruding, but molten filament continues to leak from the nozzle and is stretched into fine threads. It is also known as oozing, whiskers, or hairy prints.
What causes PLA to become stringy?
The most common causes of PLA stringing are a nozzle temperature that is too high or moisture in the filament. Start by lowering the nozzle temperature to 195–200°C. If stringing persists, dry the filament at 50°C for 6–8 hours and print another stringing test.
Comments ()