3D Print Temperature Tower: How to Print, Read & Determine Your Ideal Temp
Every filament has a sweet spot. A temperature tower finds it in one print — no guesswork, no wasted spools.
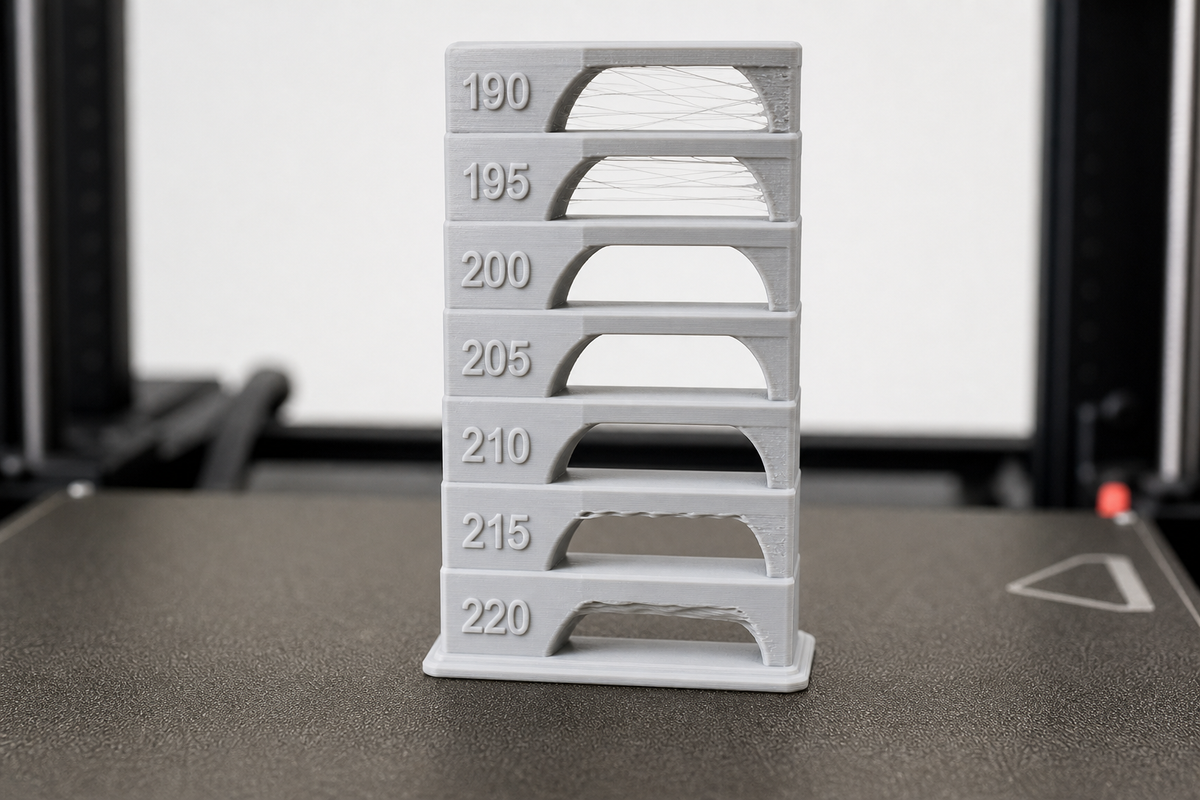
Every filament has a temperature range at which it prints best. Too much heat can cause stringing, blobs, and poor bridges. If you use too little heat, your layers may be weak and your surfaces rough. Testing every temperature individually can waste both time and filament.
A 3D print temperature tower solves that problem in one go. The different sections of the tower are printed at different nozzle temperatures, allowing you to compare the results side by side. This guide explains what a temperature tower does, how to set one up in popular slicers, how to interpret the finished print, and what to look for with PLA, PETG, ABS, and ASA.
What’s a Temperature Tower?
A temperature tower is a calibration model divided into sections, with each section printed at a different nozzle temperature. Most towers change temperature in 5°C increments. For example, you might test a range from 190°C to 220°C.
As the print moves upward, the nozzle temperature changes at predetermined heights. The same model is therefore printed at several different temperatures, making the results easier to compare.
You may also see these models called a temp tower or heat tower. A useful tower normally includes features that reveal common printing problems, including:
- Layer adhesion
- Bridging
- Overhangs
- Stringing
- Surface finish
- Small details
After the print is complete, compare the same features at each temperature. The best section should have clean details, good layer adhesion, acceptable bridges, and as little stringing as possible.
Why You Want a Temperature Tower
The temperature printed on a filament label is a starting point, not a guarantee that it will be the best setting for your printer. For example, a spool of PLA might have a recommended range of 190–220°C, but the ideal point within that range can vary depending on the brand, colour, additives, and even the production run.
Your printer setup matters as well. The hotend, nozzle, cooling, and other hardware can all affect how the filament behaves.
Temperature also influences how molten filament behaves during printing. At a higher temperature, it stays fluid for longer. That can help with flow and layer bonding, but it can also lead to more stringing, blobs, or softer details. On the other hand, too little heat can make the filament difficult to extrude and weaken the bond between layers.
This is where a 3D printer temp tower comes into play. Instead of making five or seven individual prints, you can compare several settings in one small calibration print. Finding the right temperature early can save both filament and troubleshooting time when you move on to larger parts.
Printing a Temperature Tower (by Slicer)
The exact process depends on the slicer, but the basic principle is the same: load a suitable tower, set different temperatures for its sections, slice the model, and use the preview to check that everything is correct before printing.
OrcaSlicer / Bambu Studio (1-Click Method)
One of the easiest ways to start for beginners is an OrcaSlicer temp tower. Both OrcaSlicer and Bambu Studio have built-in calibration tools that can create temperature towers without requiring you to edit G-code yourself.
Go to the calibration section and choose the Temperature Tower. Select the material and temperature range you want to test, then build the calibration model.
The slicer handles the temperature changes between sections. You don't have to enter an M104 command every time you make a change, which reduces the chance of entering the wrong height or temperature.
Before printing, verify that the selected range is suitable for your filament. The manufacturer's recommended range is a good place to start.
PrusaSlicer
You can download a temperature tower STL for PrusaSlicer and import it into your project. The temperature changes can then be added with custom G-code at the appropriate layer heights.
Use the Custom G-code at layer height option and add an M104 S[temp] command for every temperature change. Replace [temp] with the temperature you want the printer to use.
For example, if one section is printed at 220°C and the next at 225°C, the 225°C command must be placed at the layer where that second section begins.
The important part is matching the temperature to the correct section of the tower. You can check the layer heights and temperature changes with the preview function in PrusaSlicer before starting the print.
Cura
Cura has post-processing tools for handling temperature changes. First, download and import an appropriate temperature tower STL.
Go to Extensions → Post Processing → Modify G-Code and select the ChangeAtZ script. Set the Z height where each new tower section begins and enter the temperature for that section.
Repeat this for every temperature change in the tower. Then check the model in Cura's preview and make sure each temperature change happens at the intended height.
This check is important because an incorrect Z height can move a temperature change into the wrong section, making the finished tower difficult to interpret.
Download a Temperature Tower STL
If your slicer doesn't automatically create a tower, several 3D printing platforms provide ready-made models:
- MakerWorld — Bambu Lab's platform of models, including ready-to-print calibration towers.
- Printables.com — Prusa's platform with a large selection of calibration models and tower designs.
- Thingiverse — A classic source for traditional temperature tower designs, including two-post models.
When selecting a model, check for embossed temperature labels on the individual sections. Clear labels make it much easier to evaluate the finished print because you can immediately tell which temperature produced each result.
Temperature Tower Settings per Material
There is no single temperature range that works for every filament. The ranges below are useful starting points, but if your filament manufacturer recommends a different range, start with that recommendation.
Temperature Tower PLA
For a PLA temp tower, a good starting range is 190–220°C in 5°C increments. Set the cooling fan to 100%.
Stringing is relatively easy to spot with PLA. Examine the different sections and look at the fine threads that form between the features. Many PLA filaments may show less stringing around 200–205°C, but the best result depends on the particular spool and printer.
Don't judge the tower by stringing alone. Look at the surface and small details as well. The better section should have clean features without excessive blobs, rough areas, or signs of under-extrusion.
PETG Temperature Tower
For a PETG temp tower, try 220–250°C in 5°C increments, with the fan at around 30–50%.
Stringing shouldn't be the only factor you use to select a temperature because PETG doesn't behave exactly like PLA. Some PETG can produce a small amount of stringing even when the temperature is otherwise suitable.
Instead, focus on layer adhesion and bridging. You want reasonably clean bridges together with consistent, well-bonded layers. If the cooler sections are poorly bonded, compare them with the hotter sections to see whether the additional heat improves adhesion without causing excessive sagging or other defects.
ABS/ASA Temp Tower
For ABS and ASA, a good starting range is 230–260°C, again in 5°C steps. Use an enclosure and keep the fan fairly low, around 0–20%.
These materials are more sensitive to cooling and the surrounding environment. Print the temperature tower under conditions similar to those you'll use for normal ABS or ASA prints, since too much cooling can cause layer separation.
Check each section for layer adhesion, surface consistency, bridges, and overhangs. A good result should not only look smooth; the layers should also remain firmly connected.
Reading Your Temperature Tower
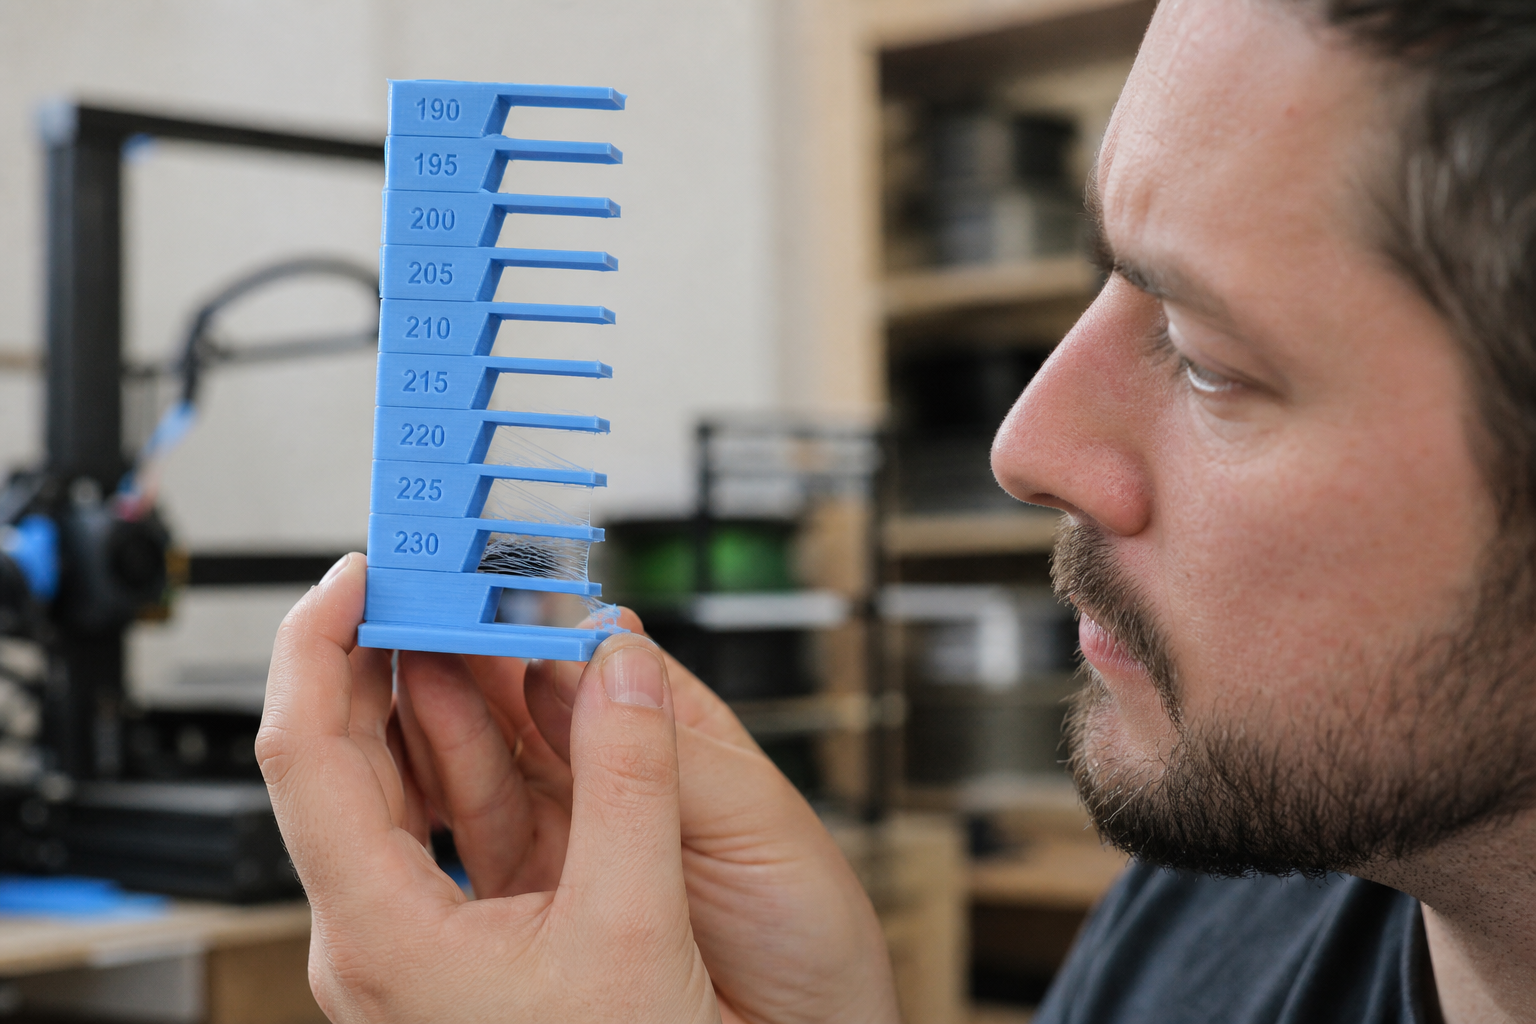
When your 3D print temperature tower is finished, don't judge it as a single object. Start with the lowest temperature and compare the same feature across each section.
Stringing: Fine threads between separate features can indicate that the temperature is too high or that the filament is prone to oozing. Find the section where the strings are least noticeable.
Layer adhesion: Check whether the layers stay firmly bonded. If a section breaks or separates easily, the temperature may be too low for reliable bonding.
Bridging: Look underneath the bridge features. Excessive sagging generally means the filament is still too soft while crossing the gap. A better section will produce a reasonably clean and flat bridge.
Surface finish: Look for blobs, rough patches, gaps, and uneven walls. Too much heat can cause blobs and loss of fine detail, while rough surfaces or gaps can be caused by insufficient heat or another extrusion problem.
Generally, a good starting point is the lowest temperature that still provides reliable layer adhesion while keeping stringing under control. If two temperatures look about equally good, compare their strength and surface quality before choosing.
Appearance isn't everything. Weak layer bonding may not be obvious in photographs, so carefully handling or testing the printed sections can reveal problems that you can't see from the surface alone.
Common Mistakes Using a Temp Tower
A temperature tower is only useful if temperature is actually the main variable you're testing. Other problems can make the results misleading.
- Wet filament: Even when the nozzle temperature is correct, moisture can cause stringing and other defects. Dry the filament before testing so moisture doesn't affect the comparison.
- Wrong fan speed: Cooling has a major impact on some materials. For example, printing at 100% fan while testing PETG or ABS may not produce results that reflect normal printing conditions.
- Other settings: Don't change print speed, flow, retraction, or other important settings. This should remain a temperature-focused test.
- Use the result on another filament: Different brands, colours, and formulations can behave differently. A temperature that works well for one spool isn't necessarily the right temperature for another.
FAQs
What temperature should I print PLA at?
PLA is typically printed around 200–210°C, but the ideal temperature depends on the filament and printer. A practical way to find a good starting point is to use a temperature tower from 190–220°C in 5°C steps.
Do I need a temp tower for each new spool?
Not necessarily. It is useful to test when you change brand, colour, or formulation and the filament behaves differently from your previous spool. If you're reusing the same brand, colour, and formulation, you generally don't need to perform the test again unless you notice a change in print quality.
My tower is looking bad on every level. What is wrong?
If every section looks bad, the problem may not be temperature. The entire tower can be affected by wet filament, a partially clogged nozzle, incorrect flow, or another printer problem. Fix those issues first, then run the temperature test again.
Can I use the output on another printer?
You can use the result as a starting point, but don't expect the exact temperature to transfer perfectly. The ideal temperature can vary by around 5–10°C between printers because of differences in cooling, hardware, and temperature calibration. If you move the same filament to another machine, running another temperature tower is the more reliable way to establish the new setting.
Comments ()