FDM 3D Printing: Everything You Need to Know Before Your First Print
Learn how FDM 3D printing works, which materials and printers to choose, and how to get started. Covers FDM vs FFF, FDM vs resin, costs, tips, and more.

If you're brand new to 3D printing, start with our 3D Printing 101 guide first. In this article, we will focus on one of the most popular and beginner-friendly technologies, FDM 3D printing.
What Is FDM 3D Printing?
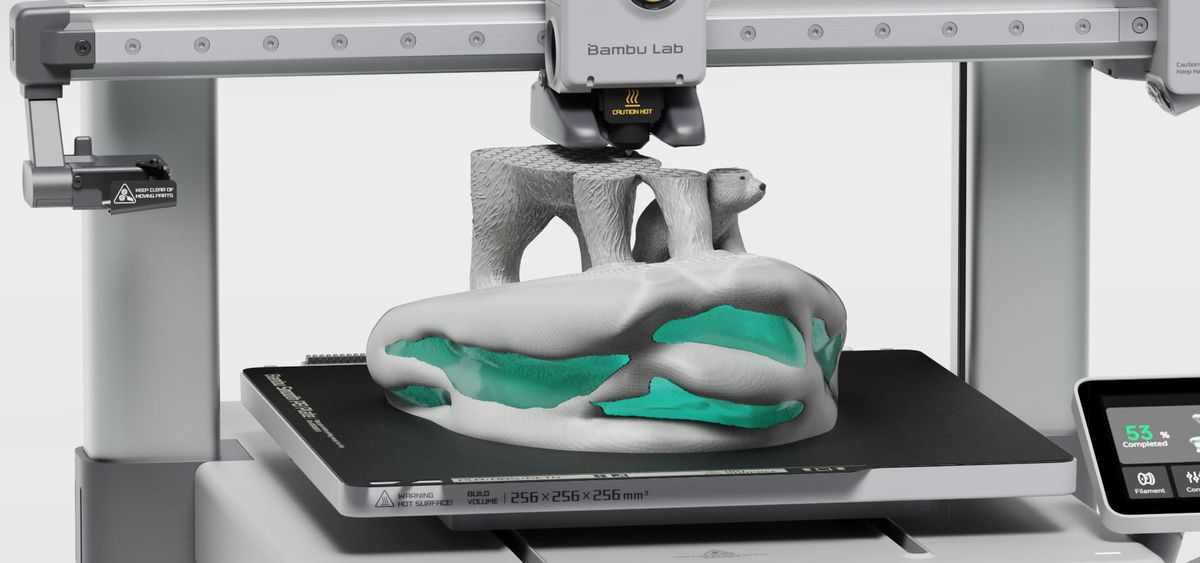
FDM 3D printing is a manufacturing process that builds 3-dimensional objects by melting plastic filament and depositing it layer by layer. This is the most common type of 3D printing, especially for home and hobbyist use, because the printers and materials are affordable and easy to work with.
One thing you might have come across while researching FDM is the term "FFF," and this trips a lot of people early on. FDM stands for fused deposition modeling, which is a registered trademark of Stratasys, the company that invented the process back in the late 1980s. When the open-source RepRap project started building affordable desktop 3D printers in the 2000s, they weren't able to legally use the trademarked term, so they coined "FFF," or fused filament fabrication, to describe the exact same process without the legal baggage.
In practice, you will see both used all the time, often interchangeably, and sometimes even on the same product page. If a printer is marketed as "FFF," it works the same way as one labeled "FDM." There's no meaningful technical difference between the two. They just differ in naming history and who's using which term.
How Does FDM 3D Printing Work?
Basically, FDM printing is like a hot glue gun following a very precise recipe. Everything starts with a digital design file, which is translated into machine-readable instructions. The printer uses a spool of solid plastic filament, which it feeds through a heated nozzle where it melts. Then it’s deposited along a controlled path, building your object one thin layer at a time, from the bottom up.
Here’s the basic journey of a print, step by step:
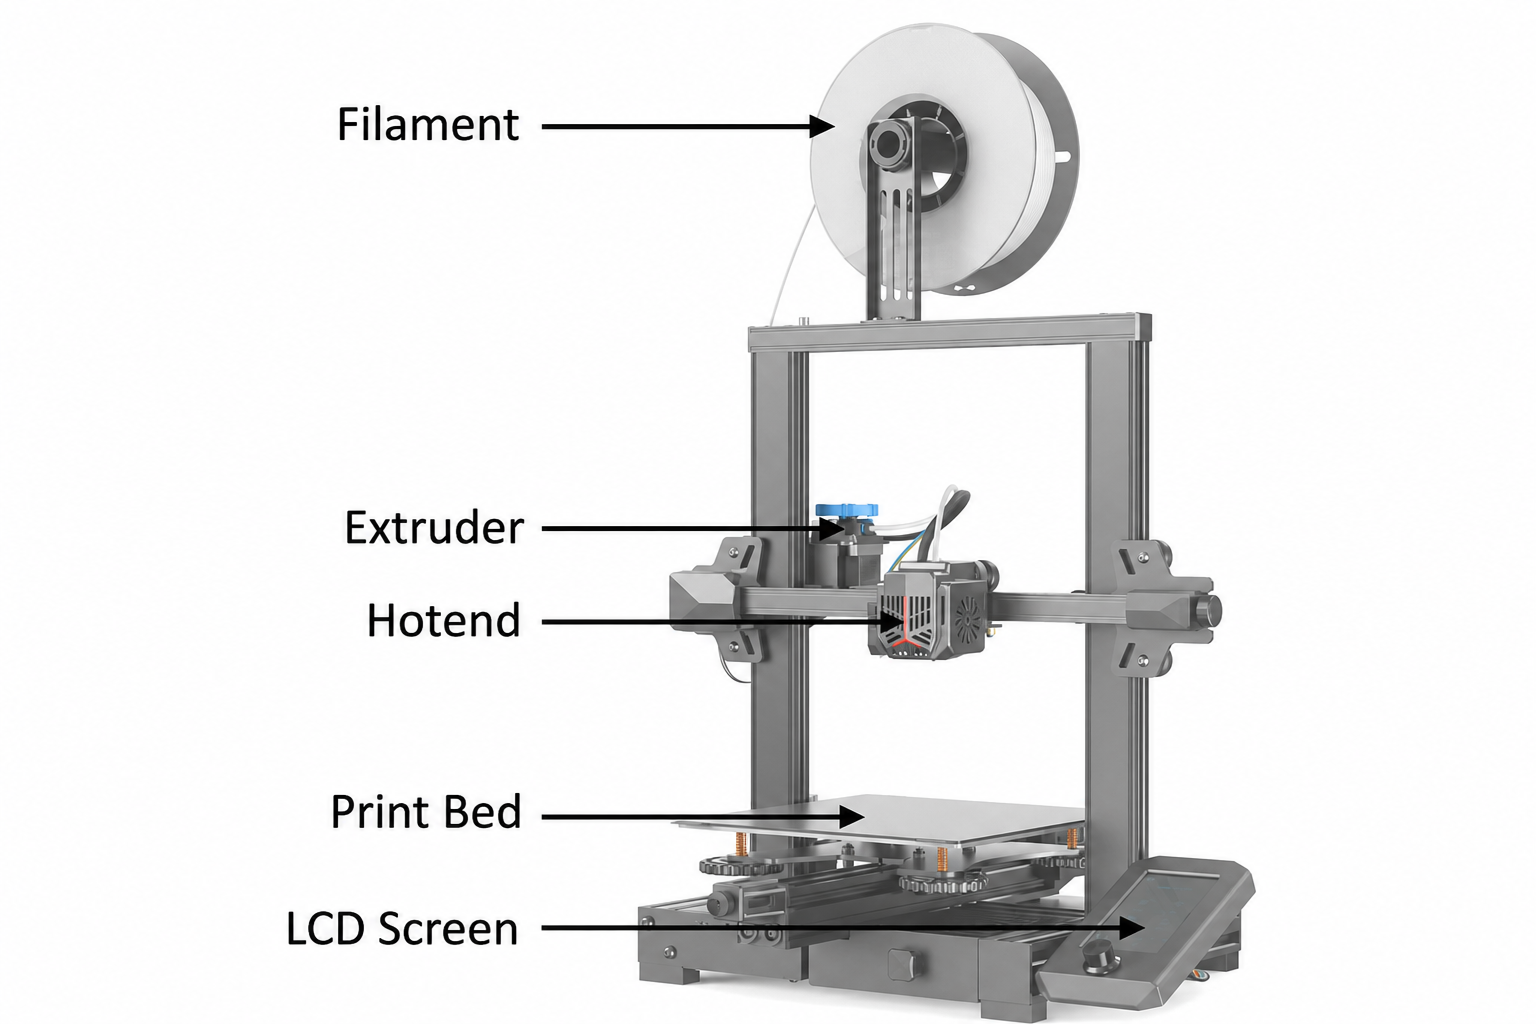
- Filament spool: It is a long continuous strand (usually 1.75mm in diameter). The filament is loaded onto the printer and fed toward the print head.
- Heated nozzle: Inside the hot end, the filament is heated to roughly 190–250°C, depending on the material. At this temperature, the plastic becomes soft and flowable. Then the material is pushed through the nozzle, which controls how much material comes out at any moment.
- Extrusion path: The print head moves across the build plate based on the preplanned path, laying down melted plastic exactly where it's needed. Each layer cools and solidifies almost immediately.
- Build layer by layer: When a layer is finished, the print head (or build plate, depending on the printer design) moves up slightly, and the next layer is placed on top. This is repeated, sometimes hundreds or thousands of times, until the object is complete.
Slicer Settings:
Before a model can be printed, it needs to be "sliced," converted into instructions the printer can follow. So when you first open up your slicer, these are the three settings you’ll actually need to know.
- Layer height: Determines the thickness of each layer and influences the surface finish. Thinner layers appear smoother, but take longer to print. A good speed/quality balance is 0.2 mm.
- Infill: Controls how solid the inside of your print is. 15%-20% infill is more than enough for most everyday prints. Most objects don’t really need to be 100% solid.
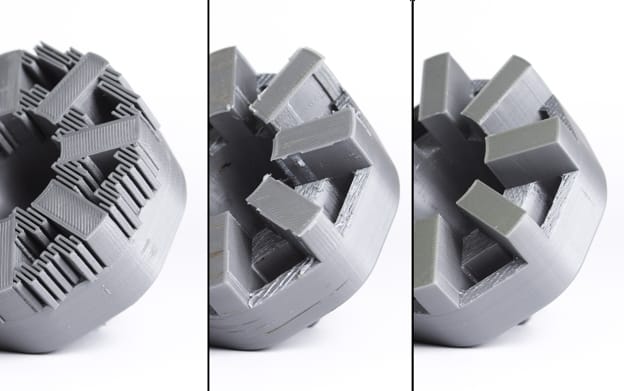
- Supports: Temporary structures that support tricky overhangs while printing so they don’t sag or collapse during the print. Once printing is done, you remove these.
Additionally, the difference between industrial and desktop FDM 3D printers is the capacity; the core technology remains the same. Industrial FDM printers from companies like Stratasys and Markforged offer larger build volumes and tight tolerances. They also have access to engineering-grade materials like ULTEM and polycarbonate.
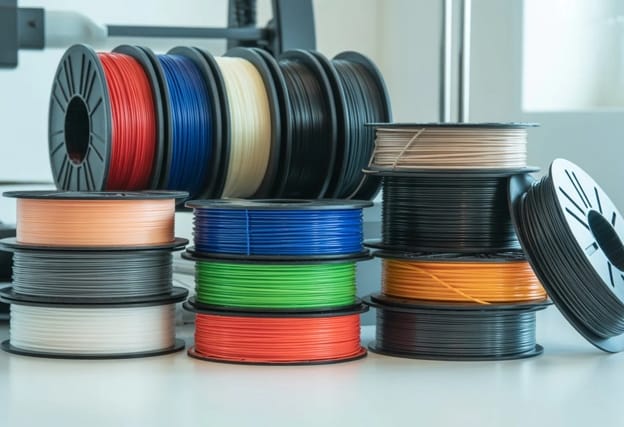
FDM 3D Printing Materials
One of the biggest advantages of FDM 3D printing is the broad range of materials to choose from. Here are the most common ones you’ll come across when you start printing:
| Material | Best For |
|---|---|
| PLA | It is a beginner-friendly option that is easiest to print with minimal odor. It works great for low-stress parts and is eco-friendly. Costs ~$20/kg. |
| PETG | It is more heat-resistant than PLA and is great for functional parts needing durability and flexibility. |
| ABS | If you need to print heat-resistant parts, then go for ABS, but you’ll need an enclosed printer and ventilation. |
| TPU | TPU is a flexible rubber-like filament used for parts like phone cases, gaskets, and wearables. It requires slower print speeds. |
| ASA | ASA is built for outdoor use, a UV-resistant alternative to ABS with similar strength. |
| Nylon (PA) | Nylon is for strong, wear-resistant engineering parts. But it absorbs moisture easily, so store it dry. |
| Carbon Fiber composites | These are composite filaments, chopped carbon fibers mixed into a base plastic like PLA, PETG, or Nylon. The result is a material that acts like a normal filament while printing but performs much more like an engineering-grade composite after it has solidified. |
If you are thinking, are FDM and PLA the same thing? The answer is no; PLA is a material, and FDM is the printing technology. Many different materials can be printed with an FDM printer. PLA just happens to be the most popular starting point.
Types of FDM 3D Printers and What They Cost
Not all FDM 3D printers are the same. Some are built for absolute beginners, some for speed, etc. Here are some factors you’ll need to decide on when buying an FDM 3D printer:
Motion System
The motion system is the most important thing to understand before you buy — it affects print speed, quality, and price more than almost anything else.
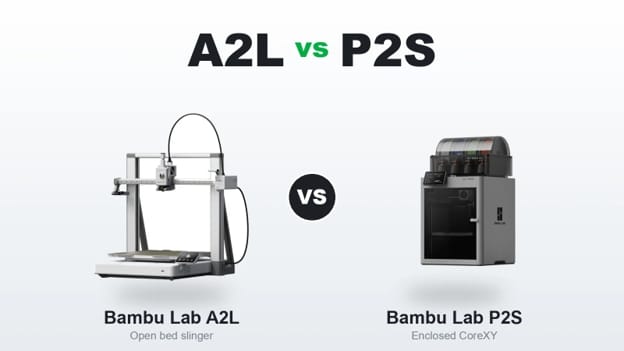
- Bed Slinger: The build plate slides back and forth on the Y-axis while the print head handles the X and Z axes. It’s the simpler, cheaper design, and you’ll see it on popular entry-level printers like the Bambu Lab A1 and Ender 3. The trade-off is speed; the moving bed adds mass, which limits how quickly you can print before the quality begins to suffer.
- CoreXY: In this version the print head moves in both X and Y axes by means of a belt system, whereas the bed only moves up and down on Z. Because there is less mass moving at high speeds, these printers can run at much higher speeds and are better suited to detailed, high-quality output. This design is used by machines like the Bambu Lab P1S and X1C and the DIY Voron series. They are generally more costly, but you can definitely feel the difference in speed and accuracy.
Enclosure
- Open frame: PLA and PETG print pretty easily, no problem. But an open frame is not good for materials like ABS or nylon that need a stable ambient temperature to print reliably.
- Enclosed: Maintains a constant temperature, which reduces warping, improves layer adhesion on tricky materials, and also reduces noise. If you want to print ABS, ASA, or any engineering-grade filament, then an enclosure is necessary.
Extruder and Nozzle Setup
- Single nozzle: The default on most printers and covers the vast majority of use cases.
- Multi-material system: Systems like the Bambu Lab AMS or Prusa MMU allow you to print in multiple colors or change materials mid-print, making them a great addition to any printer. They add complexity and cost, but if you have multi-color prints on your radar, they are worth considering.
Price Tiers
| Tier | Price | Who It's For |
|---|---|---|
| Entry-level | $150–$ 300 | First printer, casual use |
| Mid-range | $300–$ 700 | Hobbyists wanting speed and reliability |
| Prosumer | $700–$ 1500 | Power users, multi-material enclosure |
| Industrial | $10,000+ | Manufacturing, engineering-grade materials |
FDM 3D Printing Software
Before you can print anything, you need a software tool called a slicer. The slicer takes your 3D model and converts it into machine instructions called G-code. Then the printer starts printing. Here's where to find both.
Where to Get Models
If you are not designing your own models yet, these are the three sites to spend the most time on:
- MakerWorld: Bambu Lab’s platform is growing fast and has a reward system that encourages designers to publish quality models.
- Printables: Prusa run, well-curated, and one of the most beginner-friendly libraries around.
- Thingiverse: The original and largest free model library. A bit old-fashioned in style, but the amount of content makes it difficult to skip.
- Tinkercad: If you want to do your own models, then Tinkercad is the best place to start; it's free, it runs in your browser, and it has a shallow enough learning curve that most people are cranking out basic parts in an hour.
Slicers
- Bambu Studio: Easiest entry point if you’re on a Bambu Lab printer. It has pre-tuned profiles, so you’ll do less tinkering right out of the box.
- Orca Slicer: Open source, works on most FDM printers. More control for those who want to go deeper.
- PrusaSlicer: Made by Prusa, works fine on non-Prusa hardware, and has good community documentation.
Post-Processing for FDM Prints
Most FDM prints look good fresh off the printer, but with a little extra work, they can look great. Here are the main techniques worth knowing about:
- Remove Supports: First, you'll snap or cut off any supports your print requires. Here, a pair of flush cutters and a craft knife are your best friends. The contact points can be a little rough, so clean them up delicately so you don't rip the part underneath.
- Sanding: Wet sanding works surprisingly well on FDM prints, especially PLA. Start at about 220 grit to knock down the layer lines, then move on to 400 and finally 800 for a progressively smoother finish. It takes patience, but it’s worth it for the results.
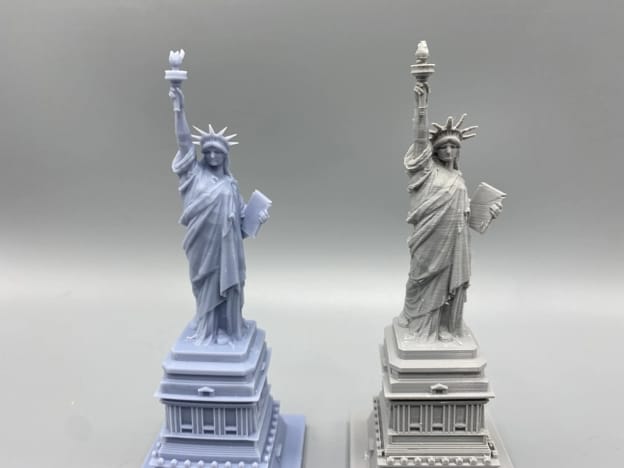
- Priming and painting: After sanding, a layer of filler primer spray fills in any remaining imperfections and gives the paint somewhere to grip. Acrylic or spray paint goes on cleanly from there, and the result can literally fool people into thinking it wasn’t 3D printed.
- Acetone vapor smoothing: This is only for ABS and ASA prints. The part exposed to the acetone vapor undergoes a light surface melt of the exterior, smoothing the layer lines to a near injection-molded surface. Its results are impressive. Just make sure you do it somewhere well-ventilated.
FDM Best Practices
If you are just starting with FDM 3D printing, you should know that there are a few small habits that make your prints surprisingly better. Here are a few things that will save your early prints from failure, and most of them are simpler:
- Bed leveling: When the print head is too far from the build plate, the first layer won't stick. Too close, and it will drag and smudge. Most modern printers do this automatically, such as the Lidar system from Bambu Lab or the popular BL-Touch sensor. But if your printer needs manual leveling, take the time to do it right before your first print and check it from time to time afterwards.
- Watch the first layer: Don't go away, really. If the first layer adheres cleanly and evenly, the rest of the print almost always falls into place. If something looks wrong in the first few minutes, it's much better to catch it early than to return two hours later to a spaghetti mess on your build plate.
- Print Orientation Matters: Print orientation will affect the strength of a part based on how you lay it on the build plate. FDM parts are strongest along the layers and weakest between them, so try to orient parts so that the stress they'll experience runs along the layers rather than across them.
- Avoid warping: One of the most common frustrations in FDM is corners peeling off the bed mid-print. A heated bed helps; adding a brim in your slicer gives the edges more surface area to grab onto. ABS is particularly susceptible to this, so an enclosure makes a big difference. For most PLA prints, around 60°C on the bed does the trick.
- Store your filament properly: Filament left out in the open absorbs moisture from the air, and that moisture causes all kinds of problems: bubbling, stringing, weak layer adhesion, and poor surface quality. A sealed container with a few desiccant packets is all you need. It's a small habit that saves a lot of frustration, especially with moisture-hungry materials like nylon and PETG.
Pros and Cons of FDM 3D Printing
| Pros | Cons |
|---|---|
| Lowest entry cost of any 3D printing technology. | Visible layer lines; surface finish is rougher than resin. |
| Widest material selection, from PLA to carbon fiber composites. | Lower detail resolution than resin (MSLA/DLP) for small, intricate parts. |
| Large build volumes available at mid-range prices. | Warping and adhesion issues with ABS, Nylon, and other temperature-sensitive materials. |
| Safe for home use with PLA; low odor, no special ventilation. | Supports leave marks that need cleanup and practice to remove cleanly. |
| Enormous active community and huge free model libraries. | Print times can stretch into many hours for large or complex parts. |
FDM vs Resin: Which Should You Choose?
If you're trying to decide between FDM and resin, the honest answer is that neither one is universally better than the other; they're good for different things. So here’s how they stack up across the decisions that really matter:
| FDM | Resin (MSLA / DLP) | |
|---|---|---|
| Detail & surface finish | Moderate: layer lines are visible, especially on curved surfaces | Excellent: surfaces come out near-smooth straight off the printer |
| Entry cost (printer) | $200–$500 | $150–$250 |
| Material Cost | ~$20/kg filament | ~$30–$50/L resin |
| Build Volume | Large: 300×300×400mm is common at mid-range prices | Small to medium: most resin printers have a much smaller print area |
| Post-Processing | Remove supports and sand if needed; mostly optional | Wash in IPA and UV cure after every single print; it is not optional |
| Safety | PLA is safe for home use, low odor, no special ventilation | Liquid resin is a skin irritant—gloves and ventilation are non-negotiable |
| Best For | Functional parts, large prints, beginners who want a forgiving experience | Miniatures, jewelry, dental models, and anything where fine detail is the priority |
The decision really comes down to what you want to make. For those who love highly detailed miniatures or small, intricate objects where surface quality is everything, it’s hard to beat resin. But if you want to print functional parts or larger objects, or you’re just getting started and want something forgiving and safe to use at home, FDM is the better starting point for most people.
If you're genuinely not sure which way to go, start with FDM. It's more forgiving, safer to use at home, and gives you the widest range of things you can make.
FDM 3D Printing Applications
One of the things that makes FDM so compelling is the range of practical uses, from fixing something around the house to running a small business. Here’s a peek at what people are really doing with these printers.
- Home use: This is where most people start, and honestly it never gets old. Broken appliance knob? Print a replacement. Need a cable organizer, a phone stand, or a custom mount for something awkward? FDM handles all of it. Hobbyists use it heavily too; RC car components, drone parts, cosplay props, and tabletop gaming accessories are all extremely popular in the community.
- Side income: A surprising number of people turn their FDM printer into a revenue stream. Print farms running multiple machines can fulfill local on-demand orders, while platforms like Etsy have a healthy market for FDM-made products; lithophane lamps, custom nameplates, and planters are perennial bestsellers. The barrier to entry is low if you already own a printer.
- Professional and industrial use: FDM is a serious manufacturing tool at the high end. It allows product designers to iterate physical prototypes in hours rather than weeks and fundamentally changes the speed of developing and improving an idea. FDM-printed jigs and fixtures are common on the factory floor, and some industries, such as aerospace, use it for low-volume production parts and tooling where the economics of injection molding don’t make sense.
Frequently Asked Questions
What is FDM in 3D printing?
FDM (Fused Deposition Modeling) is a 3D printing process where plastic filament is melted and laid down layer by layer to create an object. This is the most common type of 3D printing for home and hobbyist use, as hardware and materials are affordable and approachable.
What does FDM stand for?
FDM stands for Fused Deposition Modeling. It's a registered trademark owned by Stratasys. FDM is the most widely used of the 3D printing methods.
Are FDM and PLA the same?
No, FDM is the printing technology, PLA is one of the many materials you can print with an FDM printer. PLA is the most popular starting material as it is easy to work with, but FDM printers can work with a wide range of filaments including PETG, ABS, TPU, nylon and more.
Is FDM better than other 3D printing technologies?
It depends entirely on what you're making. FDM is the most versatile and affordable option for functional parts, large prints, and everyday use. For fine detail and smooth surfaces, resin-based technologies like MSLA have the edge. The right one depends on your specific needs.
Which is better, SLA or FDM?
For most of the newbies and those interested in functional parts, FDM is the more practical choice. It’s safer, cheaper, and provides a much larger build volume. SLA and other resin technologies are fantastic for when surface quality and fine detail are the priority, such as miniatures or jewelry. If you are not sure, go with FDM.
How much does FDM 3D printing cost?
A good starter FDM printer will run you $200 to $500. Filament for common materials like PLA and PETG runs about $20 a kilogram for PLA, up to $25–30 for specialty materials like PETG or TPU, and a typical print costs a few cents to a few dollars in material depending on the size.
What materials can FDM printers use?
FDM printers are able to print with a wide range of materials. Beginners usually start with PLA and then move on to PETG, ABS, TPU, ASA, Nylon, and carbon fiber composite filaments as their projects require higher performance. Most of the materials your printer can print depend on its temperature range and whether or not it has an enclosure.
Comments ()