How to 3D Print in Multiple Colors: Every Method Explained
You don't need an expensive machine to print in color. Here's every method from free to fully automated — and which one actually makes sense for you.
3D printers are one of the most fascinating technologies of the era, allowing people to create almost anything. However, it's not just the creation part that's interesting.
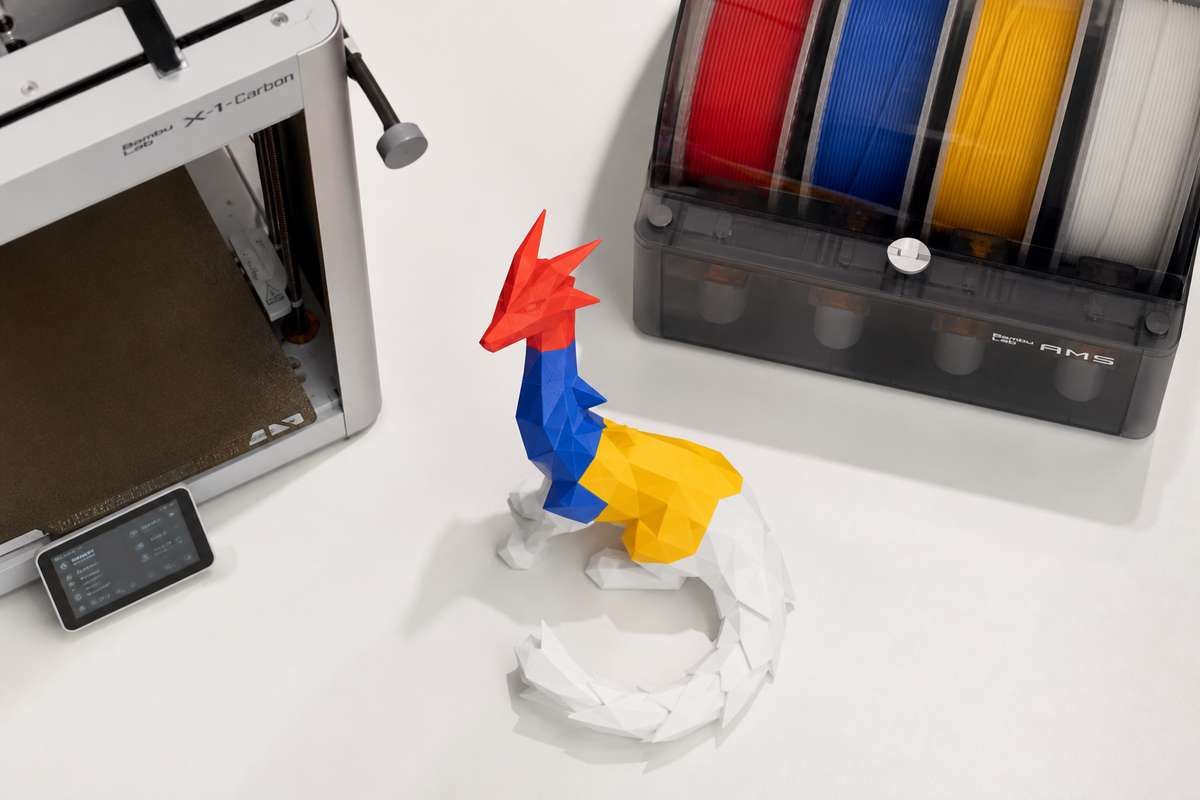
One of the most interesting parts is that these printers can switch between filament colors mid-print — producing objects with distinct colored regions in a single job. That's right: whether it's the red, yellow, or blue section, a multi-color 3D printing machine knows exactly when to change colors.
If you’re still wondering how to 3D print in multiple colors or how to work with a full-color 3D printer, read the following guide for detailed insight.
We don't just explain the process but also provide a list of printing methods for multiple colors. From free manual filament swap to the fully automated 4+ color systems, we cover everything.
What Is Multicolor 3D Printing? Is It Worth It?
Before we jump to the topic of multicolor 3D filaments or how to print multiple colors on 3d printer, it’s necessary to understand what multicolor 3D printing is and whether it’s worth the investment.
Multicolor printing means producing an object that contains more than one distinct color. Unlike multi-material printing, where you combine different types of filaments, here the entire color switch happens within a single print job.
This can be done either manually or through advanced software. Either way, the color changes within the machine at the right moment, helping you achieve a perfect multi-color print.
Thanks to this multicolor printing technology, people can print visual models, prototypes, and any other object with a specific color-coded feature. Thus, we can definitely call it a worthwhile investment, but keep in mind that with all these benefits, there will also be drawbacks, like longer print time, extra waste, and added effort.
So, before thinking about how to 3D print in multiple colors, try to figure out your needs.
How to 3D Print in Multiple Colors (All Methods)
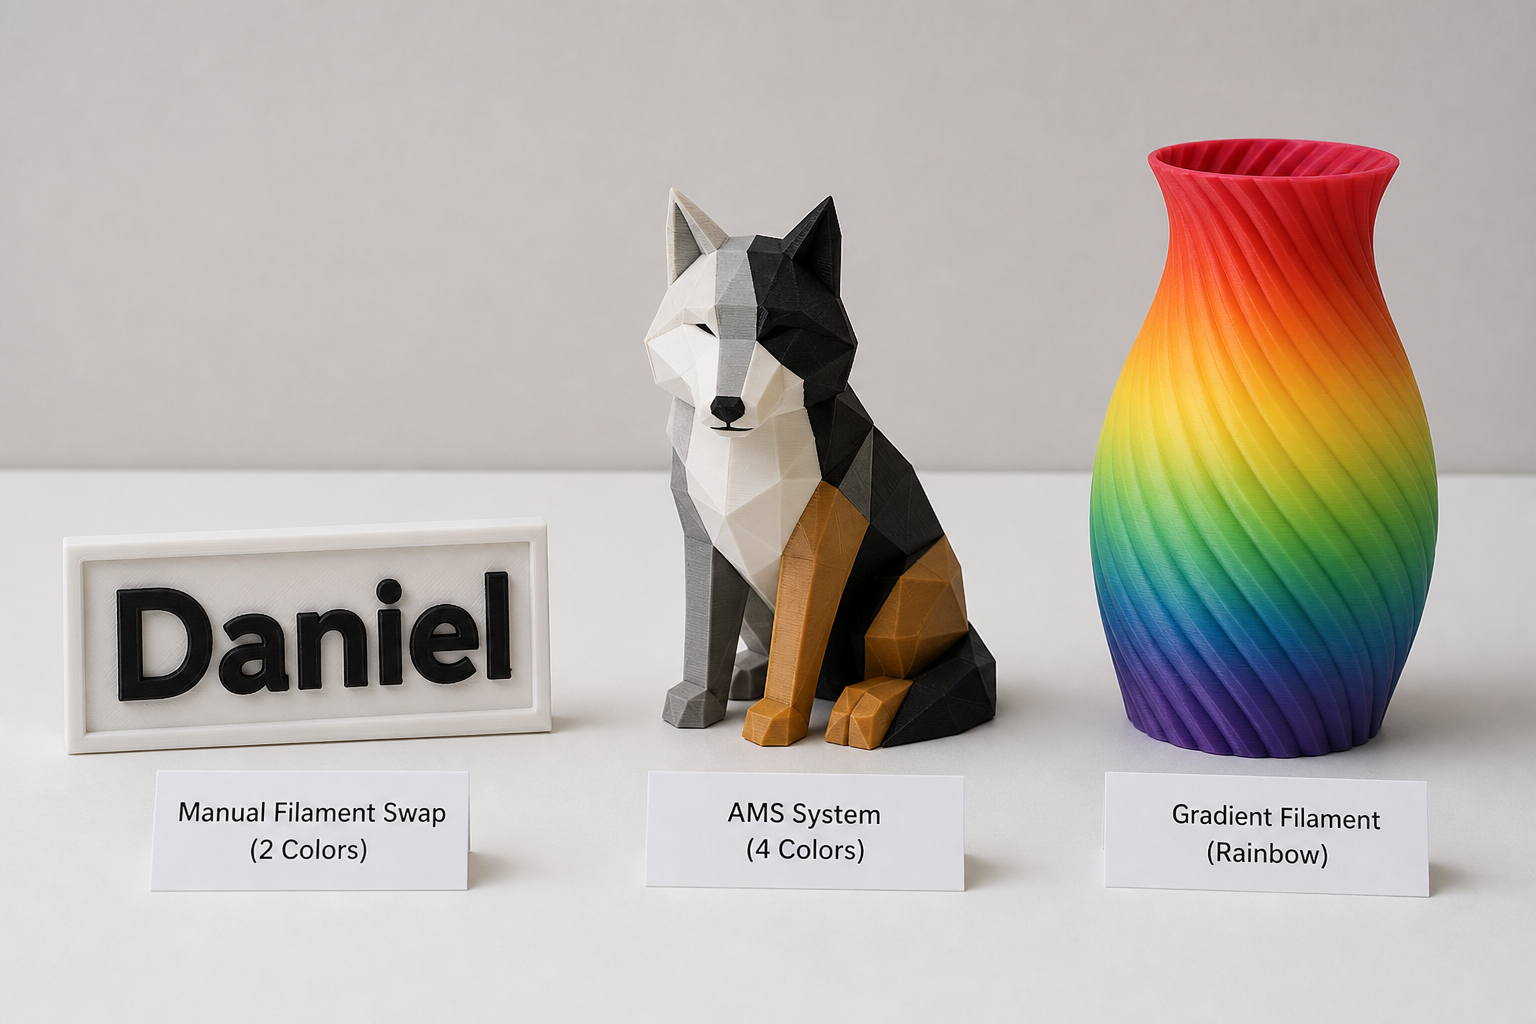
When it comes to 3D printing in multiple colors, there is no single set method. You will find multiple options with single and multiple nozzles.
Single-Nozzle Methods
Starting with single-nozzle methods, these are considered the easiest options because you have a single hotend and one nozzle. Therefore, users can easily manage the transition between colors. Here are some convenient single-nozzle methods.
Manual Filament Swap (Pause at Layer)
First up is the manual filament swap, where a user has to physically stop the multi-filament 3D printer, remove the current filament, and insert another color. By far, it is the cheapest method.
In simple terms, you pause the printing process, also known as the pause-at-height command, and change the filament. For those needing simple two-tone prints, this is an ideal choice.
Nonetheless, the color change option is only available between layers. So, if you need half the side of a layer to be red and the other half blue, that won’t be possible with manual filament swaps.
Automatic Material System (AMS / MMU)
Next up is the automatic material system commonly known as the AMS or MMU. Here, several filament spools are attached to the feeding system, and the printer automatically selects the required filament.
Different printers can support different numbers of colors, such as the Bambu Lab AMS/AMS Lite and Anycubic ACE Pro, which let you print in four colors, whereas the Prusa MMU3 supports up to 5 colors.
Printers like these make 3D printing more convenient because instead of waiting to change the filament manually, one can prepare the spools in advance and let the printer handle the sequencing. Once the 3D printer is set up, you can print detailed multi-colored models and change colors within layers.
Yet there are downsides to automated material systems as well. The biggest is purge waste — on color-heavy prints, you can waste 30–50% extra filament through the purge tower. Print times also increase due to each color-swap cycle.
Print Separate Parts and Assemble
If you're still finding a better way to 3D print in multiple colors and save on the waste, we recommend the print separate parts and assemble method. You will need to divide the model into different colored components, print each part separately, and then combine those using glue, screws, or snap-fit features.
Despite being the most underrated method, it is one of the best options because there are no special hardware requirements, it can be used with any printer, and you avoid purge waste. Thus, if you need to create figurines, logos, or cosplay parts with clearly defined color zones, this is your go-to method.
It's an excellent choice for beginners who own a basic printer, and you can even find downloadable models to help you with the design.
Gradient / Multicolor Filament
We also have the gradient and multicolor filament option where the color changes happen directly through the filament. So, you won't need to tell the printer when to switch between red, blue, or yellow.
All you need is a spool manufactured with the colors you require. Once in, the printer will create a dynamically colored object in no time. The best part: you can find rainbow, dual-color, tri-color, silk gradients, and other special filaments.
There is only one downside to this method: you lose control over the color transitions. The transition between colors might not be smooth, but if you're designing artistic objects, decorative goods, or sculptures, then it's a great option.
Post-Print Painting
If all else fails, we still have the post-print painting method. Often the best way to produce multi colored prints is by not using multi-color printing.
Instead of using different filaments or printing in parts, try to print with a single filament and then paint it afterwards. That way, you have complete control over the final appearance of the model.
From acrylic paints to primers, spray paints, and dry brushing, there are dozens of options that transform ordinary models into the most artistic ones. You get zero waste, full creative control, and don't need a specialized printer like a full-color resin 3D printing machine.
For figurines and display models where color correctness matters the most, we suggest this option.
Multi-Nozzle Methods
In case you’re wondering how to print multiple colors on a 3D printer using multi-nozzle methods, here is exactly how to do it.
Dual Nozzle (Fixed)
Multi-nozzle methods eliminate the need to load/unload filament, but they introduce their own challenges — mainly oozing from the inactive nozzle. Here you can use different nozzles for different colored filaments and use them simultaneously.
The dual nozzle method is the most popular option in this category, where you have two nozzles on a shared print head. The printer automatically switches between the 2 colors, making it perfect for printing material that requires 2 colors repeatedly or when combining color filament with soluble support material.
While these nozzles help increase the color range, there is the issue of the inactive nozzle oozing out the filament, so cleaning is a must. Additionally, correctly aligning these nozzles is also crucial, or else the layers suffer.
IDEX (Independent Dual Extruders)
IDEX, or Independent Dual Extrusion, is also used by several 3D printer enthusiasts. With IDEX, each extruder gets its own moving carriage, so instead of moving side by side, the extrusion systems move separately. It helps reduce contamination and provides duplication and mirror modes.
For small batch production, this is an ideal method because it produces twice the quantity of goods in less time.
Apart from batch production, this option offers more cleanliness because, at one time, only one extruder remains active while the other inactive one moves to the side.
In terms of cleanliness and production efficiency, nothing beats the IDEX method, but you must manage temperature and nozzle positioning carefully to get the best results.
Tool Changer
With the tool changer option, you can take multi-head printing to another level. As you have multiple tool heads, you get an individual option for each color instead of using the same nozzle.
Usually, there are more than 4 independent extruder heads, and you can swap between them at any point. Since each color is loaded separately, there is hardly any waste, and you get the most detailed prints in no time.
Some models that offer this are the Bambu Lab H2C, which has 8 hotends, and the Snapmaker U1, which has 4 extruders. Both are excellent for working with 4+ colors with minimal waste.
The only downside is the cost. These tool changers are expensive, and not every beginner can afford them.
Multi-Color vs Full-Color 3D Printing: What's the Difference?
There is another term that every 3D printing hobbyist must know, and that's full-color 3D printing. You might think a multi-color and full-color 3D printer are the same, but these are two different technologies.
A typical FDM multicolor printer and a CMYK 3D printer are very different, especially when it comes to the range of colors.
Printers offering multi-color options often offer 2 to 16 filament colors, which you can switch to produce clearly defined regions. The result is colorful, but a full-color 3D printer gives much more color choices.
Full-color printers work like inkjet printers: CMYK inkjet systems (XYZprinting, Mimaki) spray colored ink onto powder or filament layers, while PolyJet (Stratasys J-series) jets CMYK photopolymer droplets cured by UV light — producing 500,000+ colors with photorealistic gradients and textures. That's why, if you need to produce a cartoon character with simple tone colors, an FDM machine will do the job.
However, if you need photorealistic color transitions, you'll need an industrial full-color system. The cost starts at $5,000 and can exceed $250,000, but the results are unmatched.
Still, if you’re just a beginner, we suggest sticking to a multi-color FDM machine with AMS or a tool changer.
Best Multi-Color 3D Printer for Beginners
Here is a list of options that rank among the best multi-color 3D printers for beginners.
- The best plug-and-play option: Bambu Lab A1 mini and AMS Lite are ideal for a plug-and-play setup. Priced at approximately $369, it supports 4 colors and a huge .3mf library on MakerWorld.
- Best large volume: For printing larger volumes, the Bambu Lab A1 + AMS Lite, priced around $559, is the best choice. You get colors and a better build.
- Best budget alternative: Lastly, for those on a budget, the Anycubic Kobra 3 Combo + ACE Pro is the top pick. It costs around $399, offers better color options, and has a large build volume.
Tips for Better Multi-Color Prints
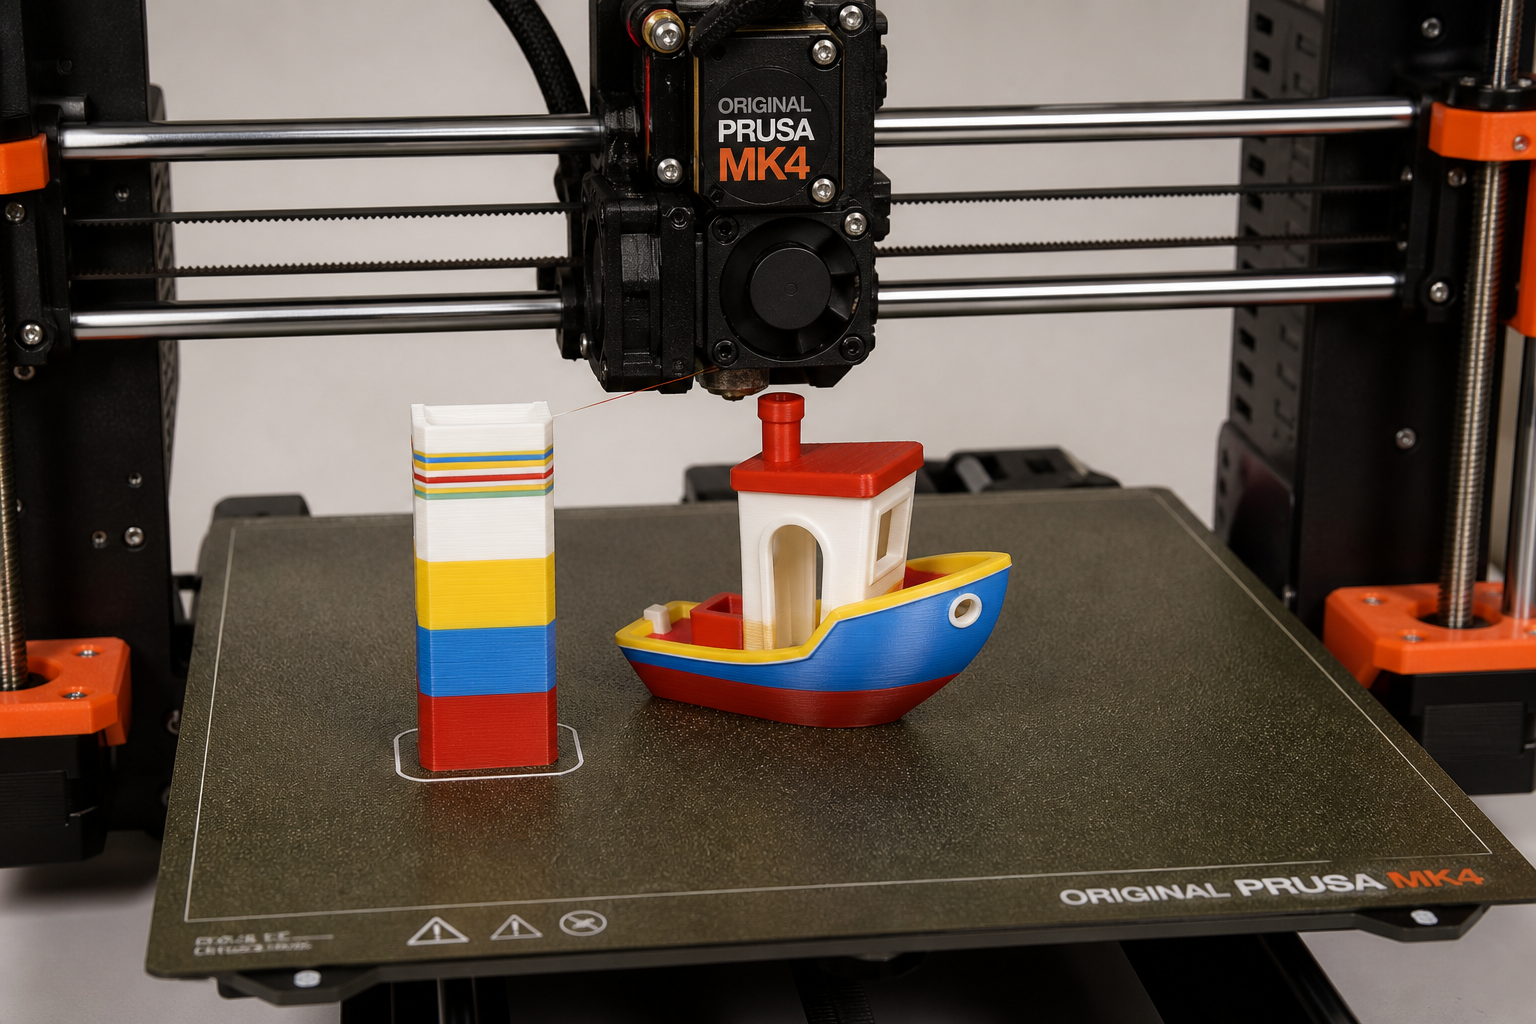
With multi-color printing, you get better quality and more efficiency, but there are always ways to improve your results. The following tips could help you achieve much better prints with minimal effort.
- Start by using a purge tower for clean transitions with AMS and MMU.
- Dry your filament before multi-color prints — moisture causes jams during filament swaps. Use a filament dryer or sealed storage with desiccant.
- Enable purge-to-infill in your slicer (available in Orca Slicer and Bambu Studio) — this routes purged filament into the model's infill instead of building a separate tower, cutting waste significantly.
- Use high-contrast colors for sharp results.
- Try placing color boundaries along edges to smooth the transition.
- Always test small batches before committing to time-consuming prints.
You can download ready-to-print multi-color models from MakerWorld or Printables — many come as .3mf files with colors pre-assigned, so you just load and print without manual color setup. Great for testing your printer before committing to a custom project.
FAQs
Can a 3D printer print multiple colors at once?
Yes, with an AMS dual nozzle, IDEX, and tool changers, you can print multiple colors at the same time.
What is the best 3D printer for beginners that prints multiple colors?
The Bambu Lab A1 mini and AMS lite are best for beginners, having a low price, a plug-and-play setup, and providing up to 4 colors to work with. The best part is that it also has a ready-to-print model library.
Is multi-color 3D printing worth it?
Yes, multi-color 3D printing is worth spending on, especially if you need to create visual models. It will cost more, produce extra waste, and take more time, but it also removes the need for hand painting.
Can you 3D print multiple colors without AMS?
It is possible with manual filament swapping, a multi-part assembly method, and a gradient filament option. You could also opt for post-print painting if the budget is low.
Comments ()