How to Use a 3D Printer: Step-by-Step Beginner’s Guide
Learn how to use a 3D printer from unboxing to finished print. 5 clear steps covering setup, slicing, printing, and post-processing, plus quick fixes for common beginner problems.

Have you just gotten a 3D printer and are feeling overwhelmed, wondering where to even start? Don’t worry; it's completely normal. The good news is that 3D printing looks a lot more complicated from the outside than it actually is.
This guide will walk you through the whole process, from unboxing your printer to holding your first finished print. And you'll have a precise idea of what to do when something doesn't go quite right.
If you are still unsure about 3D printing or what kind of printer is right for you, start with our 3D Printing 101 guide. Or, let's get your printer set up and start printing.
What You Need to Start 3D Printing
Before you get going with 3D printing, here are some basics you need:
- A 3D printer: If you are a beginner, go for FDM; it's the easiest entry point.
- Filament: The easiest material to print is PLA. Start with PLA. It’s affordable (~$20/kg) and safe for indoor use. Most printers come with a sample spool.
- A computer or smartphone: Some printers, like Bambu Lab's, let you do almost everything right, including browsing models, slicing files, and sending prints, right from an app. You’ll need a computer only if you want to tweak slicer settings or model your own designs.
- Slicer software: Bambu Studio, Orca Slicer, and PrusaSlicer are all free and work well depending on your printer. Some printers even have mobile apps (e.g., Bambu Handy) that let you browse models, start prints, and monitor progress directly from your phone.
- Basic tools: Some tools like a little scraper, tweezers, and maybe some sandpaper are nice to have, but these are not essential. These are often included in a starter toolkit with the printer.
- A clean, stable workspace: A flat, sturdy desk or table works fine. For PLA, you don't need any special ventilation. However, for resin, you need proper ventilation.
- Air filtration: You'll only need it if you move on to materials like ABS that produce fumes.
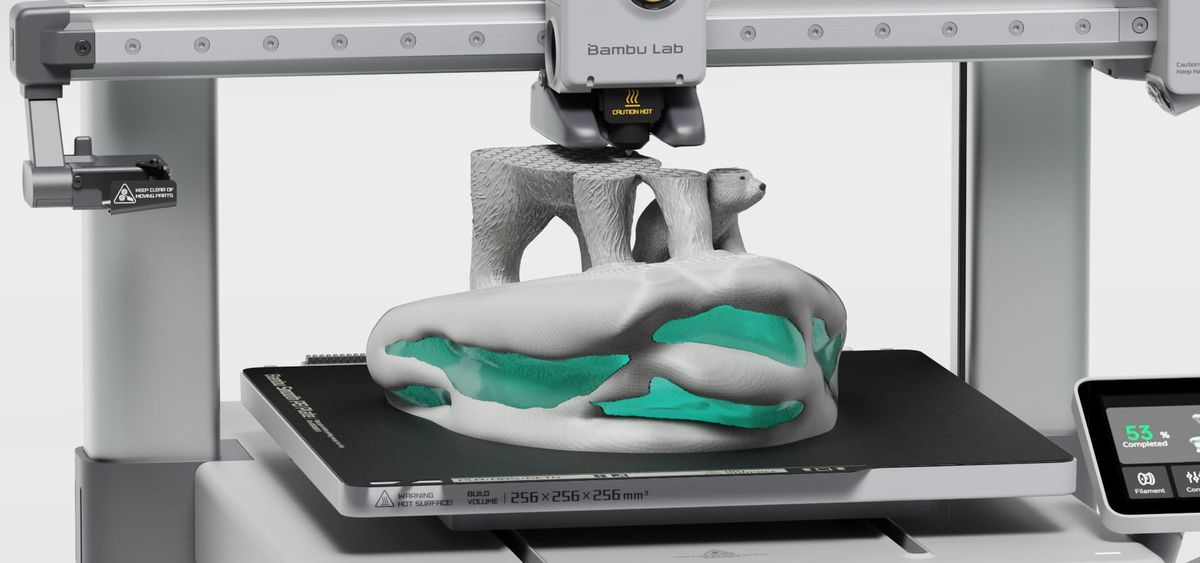
Step 1: Set Up Your 3D Printer

Let's get your printer ready to go. Follow these steps:
Unbox and inspect
- Take everything out and check it against the included parts list
- Look for any shipping damage; check the frame, rods, and connectors
- Remove every shipping restraint: zip ties, foam blocks, tape, transit screws. Missing even one can damage the machine when it starts moving. Your manual shows exactly where they all are
Assemble
- Some printers like Bambu Lab arrive nearly ready to go, while others like the Ender 3 need more work. Either way, just follow your manual step by step
- Once it's set, place it on a flat, stable surface; wobbling will cause bad prints
Calibrate
- If your printer has auto bed leveling, then just run it and let the printer do its thing
- For manual calibration, slide a piece of paper between the nozzle and the bed, and adjust each corner so that the paper just barely drags. Check your manual or watch a video on YouTube for a visual walkthrough.
- Most beginners skip this step. Poor calibration is the most common reason first prints fail
Load filament
- Heat nozzle to ~200°C for PLA
- Feed the filament through until a little melted plastic begins to ooze out of the end. That means you’re good to go.
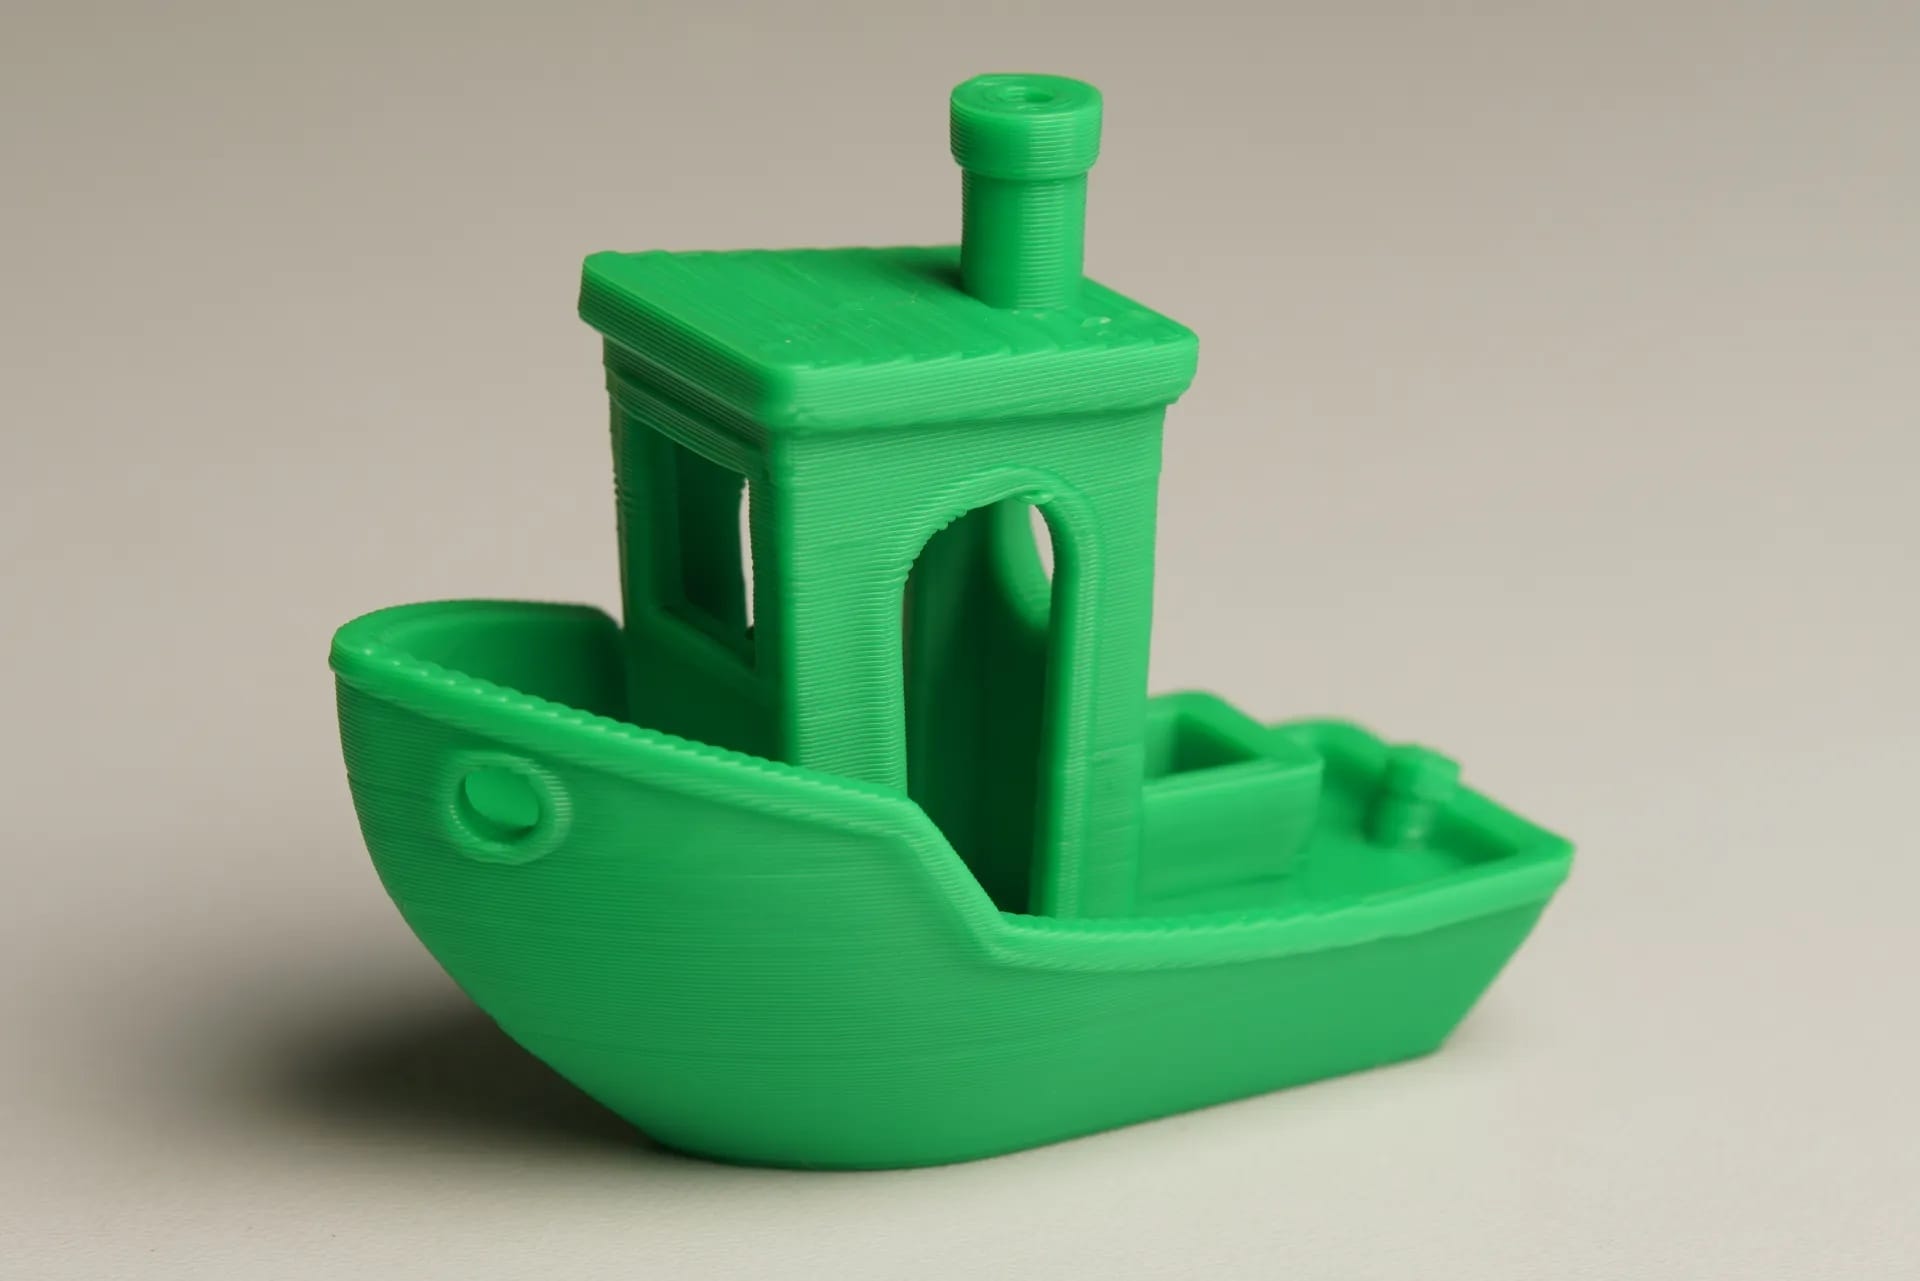
Run a test print
- Print the 3D Benchy, a tiny tugboat that's the standard test to see if your printer is dialed in. It's pre-installed on many printers
- Clean print? You are ready. If it looks off, recheck your leveling.
Step 2: Find or Create a 3D Model
Every print starts with a digital file, and the great thing is that you don’t have to design anything yourself. Thousands of free, ready-to-print models can be found online. Here are some of the best places to look at:
- MakerWorld: Bambu Lab’s growing platform with rewards for designers
- Printables: Run by Prusa, well-organized, and perfect for beginners
- Thingiverse: The oldest and biggest library out there
When you’re new, search for "benchy", "beginner" or “easy print” models that don’t require supports and print easily. A phone stand or a cable clip would be a great first project, nothing too ambitious.
If you ever want to make your own models in the future, start with Tinkercad. It’s free, it runs in your browser, and it has a minimal learning curve.
Most models are available as STL or 3MF files. Either works, but 3MF is better — it stores color, material, and print settings in one file, so less setup in the slicer.
Step 3: Slice Your 3D Model
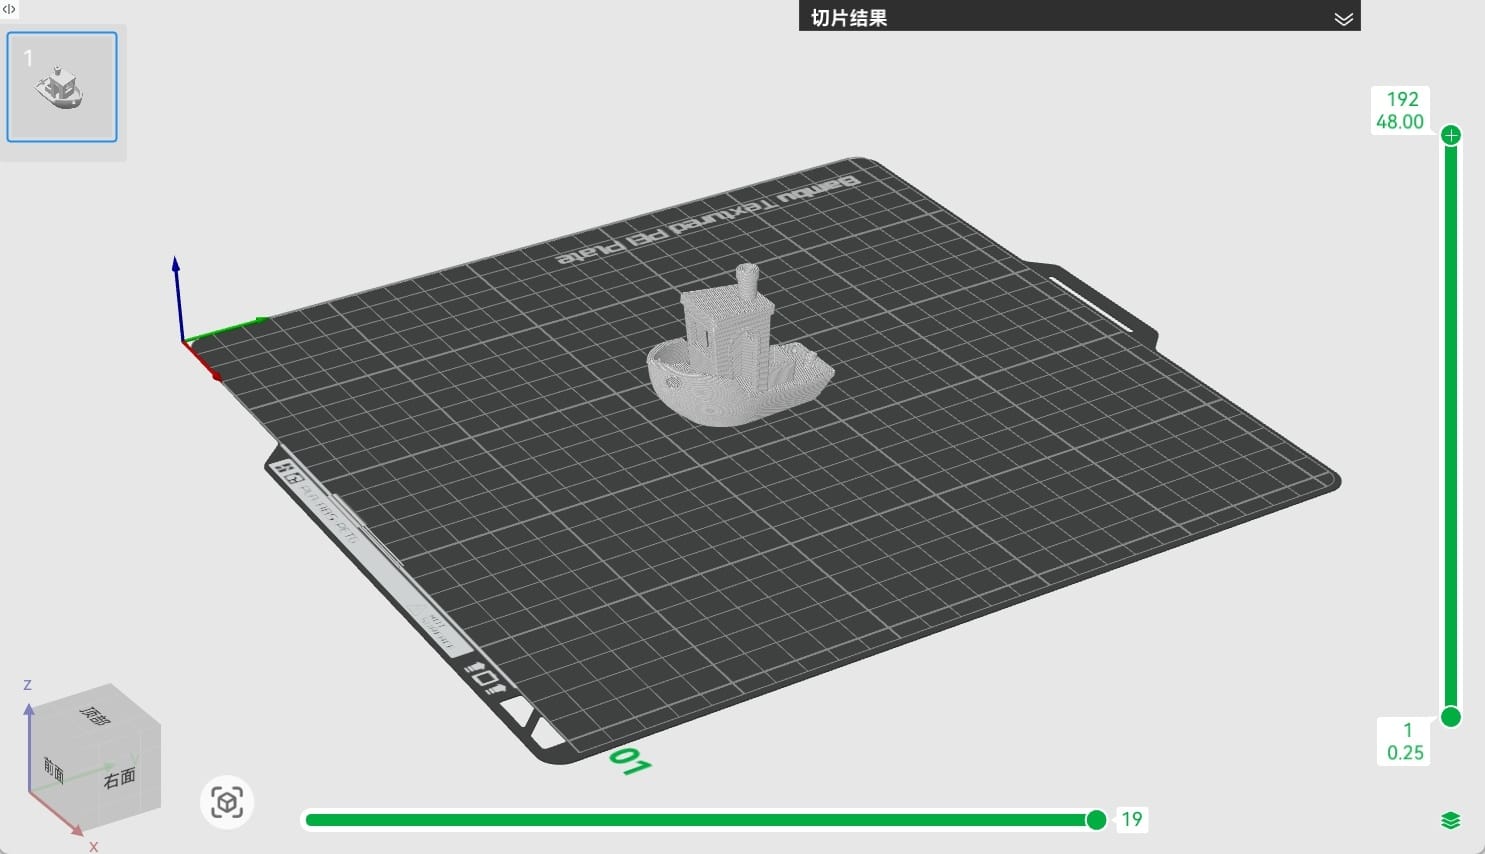
Your printer cannot read a 3D model file. First, you have to run it through a slicer, which converts it into G-code, basically a set of instructions that tells your printer exactly where to move and how much filament to lay down, layer by layer.
Which slicer you use depends on your printer:
- Bambu Studio: The go-to if you have a Bambu Lab printer. Profiles are pre-tuned, so you barely need to touch anything
- Orca Slicer: Open source, compatible with most FDM printers
- PrusaSlicer: Best for Prusa printers, but works with others as well
For your first print, just use the default settings and don't change anything. Later on, you adjust these 3 settings:
- Layer height: Start at 0.2mm. Thinner means smoother but slower
- Infill: How solid the inside is. 15-20% is good for most prints
- Supports: The slicer can automatically add these for any overhanging parts
Want to learn more about settings? We’ve got you covered in our FDM 3D Printing Guide — Slicer Settings.
Step 4: Send the File and Start Printing
Once your model is sliced, you can get it to your printer two ways:
- Wi-Fi or cloud: Most modern printers allow you to send files straight from the slicer over Wi-Fi or via an app. It's easiest if your printer will do it.
- SD Card or USB: Export the G-code and load it on a card or USB, and plug it into the printer. Easy and dependable on any printer.
Choose your file on the printer's screen and hit start. It’ll preheat the nozzle and the bed and then start up.
Now, here’s the most important part: watch that first layer.
Don't go away. The first layer decides everything, so stay and watch the first few minutes. A good one will be smooth and even, pressed tightly against the bed with no gaps or curls. A poor one will have strings, blobs, or filament that just won’t stick.
Stop the print immediately if anything looks wrong. Re-level your bed, adjust your nozzle height, and try again. So much better to catch it now than to come back an hour later to a mess. When that first layer comes down clean, you're in good shape — just let it run.
Step 5: Remove and Post-Process Your Print
Remove the print
- Let the print and bed cool for about 10 to 15 minutes; many prints release themselves as things cool.
- Still stuck? Flex the build plate lightly, or use your scraper. If the prints are stubborn, try putting an ice pack under the bed for a minute; the change in temperature usually works.
Remove supports
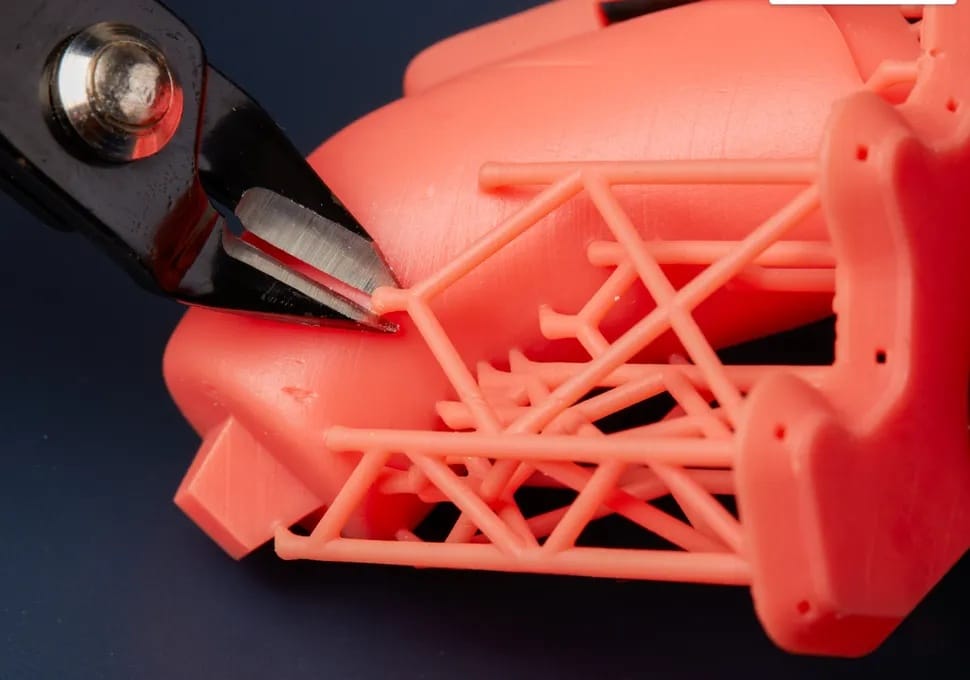
- Snap or cut them off with some flush cutters, then clean up the contact points with a craft knife.
- With more experience, the marks become easier to minimize.
Finish it up (optional)
- Sand it smooth, starting at 220 grit and working your way up to 800.
- If you want to paint it, use filler primer and then acrylic paint
More finishing techniques are in our FDM 3D Printing guide — Post-Processing.
Clean your printer
- Clean the bed and nozzle area of filament residue.
- Before your next print, clean the build plate with isopropyl alcohol; it makes a real difference for adhesion.
- Every once in a while, follow your printer's maintenance guide and check and lubricate the rails and rods
How to Use a 3D Printer at Home
One of the great things about FDM printing PLA is that you don’t need a dedicated workshop. A spare bedroom, a home office, or even a corner of your living room will do. That said, here are a few things to keep in mind:
Space and placement
- Avoid placing your printer near open windows or drafts. The smallest of air currents can cause your print to warp mid-job.
- Printing in ABS? ASA? Resin? Move to a garage or a room with an exhaust fan, as these produce fumes that need to be ventilated.
Safety basics
- The nozzle can get to 200°C+, so keep kids and pets away when it’s printing.
- Don't leave long prints totally alone, especially if you are new to it. Check in once in a while.
- Keep a small fire extinguisher close by as a precaution; it’s good practice for any electronics setup.
Noise
- Modern printers such as the Bambu Lab P1S are surprisingly quiet. Older open-frame printers are louder, so if noise is a concern, print during the day or look into getting an enclosure to dampen the sound.
Common Beginner Problems and Quick Fixes
Every beginner hits these at some point. Here's how to spot them, understand what's causing them, and sort them out quickly:
| Problem | Appearance | Most Likely Cause | Quick Fix |
|---|---|---|---|
| Print not sticking | First layer slides around or won’t stick | Bed not level, nozzle too high, dirty surface | Re-level, clean with IPA, add brim in the slicer |
| Warping | Corners lifting off the bed | Temp difference between layers and air | Set bed to 60°C, add a brim, use enclosure |
| Stringing | Thin plastic wisps between parts | Retraction too low, temp too high | Increase retraction, dry filament, reduce temp |
| Clogged nozzle | No filament coming out, gaps in layers | Filament degradation, debris in nozzle | Do a cold pull, or replace the nozzle |
| Layer shifting | Layers appear offset or stepped | Loose belts, nozzle collision, motor skipping | Tighten belts, reduce speed, check rails |
FAQs
Can a beginner use a 3D printer?
Yes, of course. Modern FDM printers now include auto-leveling and pre-tuned profiles, making it easier than ever to get started without prior experience.
How do you learn how to use a 3D printer?
The best is hands-on. Follow the setup guide, do a test print, and learn from that. Most of it’s from doing.
How long does a 3D print take?
It depends on the size and complexity. Small objects can print in 30 minutes; larger or detailed prints can take 10 hours or more.
Do I need to know CAD to use a 3D printer?
Not at all. You can find thousands of free models to download and print on sites like MakerWorld, Printables and Thingiverse.
Is it safe to use a 3D printer at home?
Yes, especially with PLA. Keep away from children and animals, check on long prints, and ventilate properly if switching to other materials.
How much does it cost to start 3D printing?
A good entry-level FDM printer costs $200–500. PLA filament is about $20/kg, slicer software is free, and most basic tools come included. You can be up and running for under $300.
Comments ()